Field Controls
In BizzStream Aero, while you have a wide range of generic controls to customize layouts visually, the core data representation comes from field controls. These controls are defined in the datasets you configure. The type of control assigned to a field is determined by the dataset's schema, often derived from a document definition. Let's delve into the field controls available within your datasets.
Formatting Field Controls
In BizzStream Aero layouts, you enjoy considerable freedom in positioning your field labels. For each field, you can set the Label Type to one of three options: Inline, Stacked, or None. Moreover, you can specify the available space for the field label using the Label Width property in the Formatting section of the field properties. When configuring label width, you must specify the unit (either pixels or percentage). Notably, formatting is only applied when the label is displayed inline. If you opt for custom formatting, it's advisable to test it across various screen sizes, especially if you use percentage width.

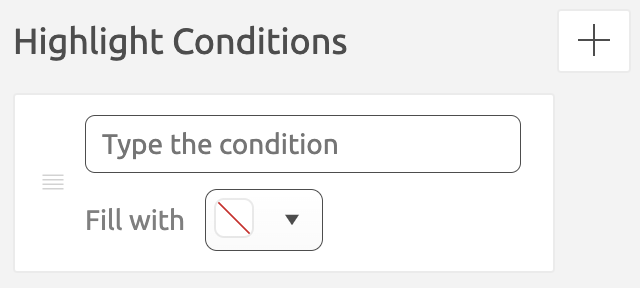
Additionally, you can define highlight conditions using BizzStream expressions. If a condition evaluates to true, the control's color will change as per your selection. It's important to note that highlight conditions don't apply to attachment and signature fields.
Customized Dynamic Data
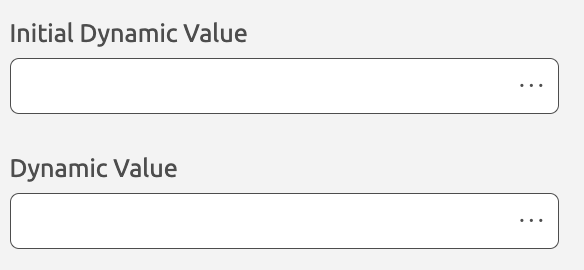
Within the document definition, you can configure dynamic values and initial dynamic values. Dynamic values are set when another field is updated, while initial dynamic values are set when a new document or line is created. In your layout, you can override these (initial) dynamic values. Field properties allow you to configure values specific to the layout. Please remember that (initial) dynamic values don't apply to status, attachment, and signature fields.
Conditionally Display or Disable Controls
Permissions for fields and lines are defined in the document definition. If a user lacks view permissions, the field won't appear in their layout. If edit permissions are absent, the field will be disabled. However, within the layout, you can further configure fields' visibility and editability.
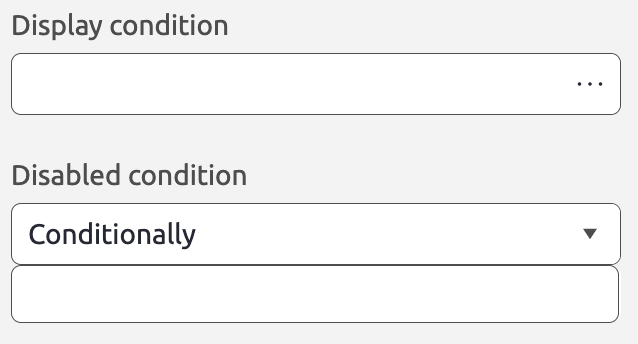
Under Display Condition, you can input a BizzStream Expression. If the expression evaluates to false, the field won't be displayed, ensuring users only see relevant fields. This is particularly useful when some fields depend on others. You can also disable fields, preventing users from editing them. Under Disabled Condition, you can choose to disable the field by default or conditionally by selecting Conditionally from the dropdown. In the latter case, provide a BizzStream expression. If it evaluates to true, the control will be disabled, even if users have edit permissions based on the access group in the document definition.
Fields with Special Features
BizzStream Aero offers control-specific properties to enhance the user experience.
Help Users Find the Right Values with an Overlay Layout
Reference fields play a crucial role in BizzStream processes. Users rely on them for selecting equipment, cost types, materials, and more. However, space can be limited, especially in a line field within a grid. Choosing the right reference label can be challenging. The overlay Layout feature comes to the rescue. It allows users to select reference values from another layout connected to the same document definition as the reference field.
To configure a Search Layout:
- Double-click the reference field in the layout to open the properties pane.
- Under Layout, select the layout containing the document list dataset you want to use.
- Under Control to select documents from, choose the control that contains the documents in the selected layout.

If configured, users can open the Search Layout, select items, and populate the reference field effortlessly.
Tips:
- Include relevant information in the Search Layout, excluding non-filtered items.
- Add filter controls to enhance the user's search experience.
- Consider including instructional labels in the Search Layout.
- Use the BizzStream Expression
ISOVERLAYLAYOUT()to conditionally show/hide fields when the layout is opened as a Search Layout.
Automate Data Entry by Scanning QR Codes
For text and reference fields, users can employ a QR code scanner to streamline data entry. Scanning a QR code saves time and reduces errors. QR code scanning is available for text fields and reference fields, offering different modes:
- Filter: Filters results based on the scanned value.
- Select First Partial Match: Selects the first partial match between the scanned value and the reference label.
- Select Unique Match: Selects a referenced document only if there's an exact match with the scanned value.
To enable QR code scanning for a field:
- Double-click the field in the layout to open the properties pane.
- Under Enable QR, check the checkbox.
Use a Switch Button Instead of a Checkbox
Checkbox controls are common in BizzStream processes. However, BizzStream Aero allows you to render checkboxes as switches. This can be particularly useful when you want to visually emphasize the action of "switching on" certain fields, like toggling the visibility of grid columns based on checkbox states.
To render a checkbox as a switch:
- Double-click the checkbox field in the layout to open the properties pane.
- Under Render Mode, select Switch.

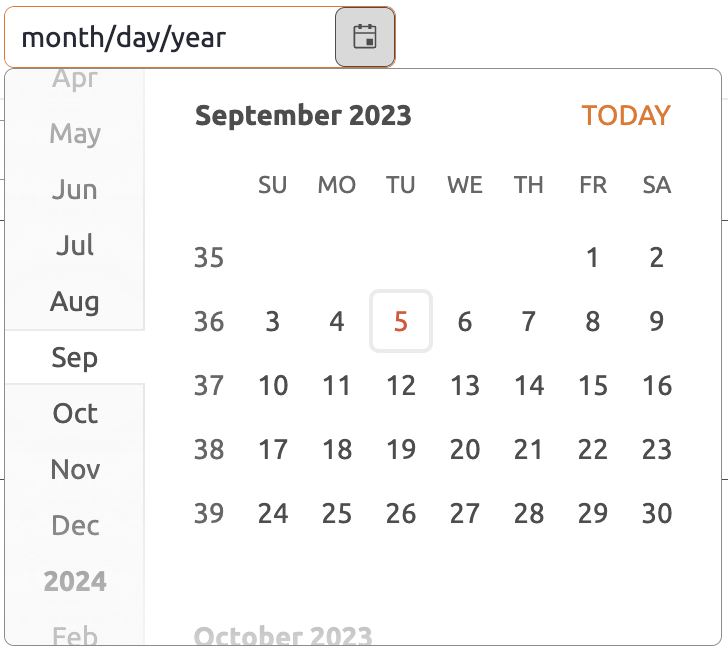
Enhance the Date Control by Showing Week Numbers
In the date control, users can select dates using a calendar view. By default, this view displays only the dates of a specific month. However, you can choose to display week numbers for better date navigation.
To enable week numbers in a date control:
- Double-click the date field in the layout to open the properties pane.
- Check Show Week Number.

Geolocation Control
The Geolocation Control allows users to input their current location, an address, or coordinates and outputs latitude, longitude, and formattedAddress using Google Map's Geocoding API.
To unlock full functionality, ensure a Google Maps API Key is configured in the environment settings.

Configuring & Using the Geolocation Control
The geolocation control shares most properties with the Label Control. Minimal setup is required, but the control offers powerful features to enhance the Aero experience.
Geolocate
The Geolocate button ![]() works similarly to earlier versions. Click/tap the button and grant location permissions to populate the latitude and longitude fields with your current location.
works similarly to earlier versions. Click/tap the button and grant location permissions to populate the latitude and longitude fields with your current location.
When geocoding is enabled and the API is configured, an address is fetched automatically. See the (Reverse) Geocoding section for details.
(Reverse) Geocoding
New in 2025-1: Users can input an address to retrieve coordinates or vice versa. The latitude and longitude values are displayed below the input field.
Usage
- Configure a Google Maps API Key in the environment settings.
- Input an address as you would in Google Maps and press
ENTER. - The control will:
- Geocode the address into latitude, longitude, and a
formattedAddress. - Replace the input with the
formattedAddress.
For reverse geocoding (latitude/longitude to address):
- Use the Geolocate button or the Map Control.
- If no
formattedAddressexists yet, it will attempt to fetch one when the document is loaded, provided the API is available.
Language and Region
Geocoding results may vary based on the user's locale and language settings. Include house number, street, and city information for better accuracy.
Google Pluscodes
If an address cannot be determined, geocoding may return a Google Pluscode. Pluscodes are unique location codes ensuring every spot on Earth has an identifiable address. Learn more about Pluscodes here.
Fallback Option: Manual Coordinates
For users without a Google Maps API Key, an active internet connection, or those preferring manual input, the control supports coordinate entry.
Format: longitude,latitude or longitude, latitude
Examples:
- 4.543,6.87442
- 8.762346, 6.76
Use a period (.) as the decimal separator and a comma (,) to separate longitude and latitude.
BizzStream Expressions
Already have address fields (e.g., city, street, etc.)? Link these fields to the geolocation control using BizzStream Expressions in the dynamic field properties of the Geolocation Control. The geolocation control updates automatically when these fields change.
Map Control Support
For locations without addresses (e.g., highways), coordinate-based input is simplified using the Map Control.

Setup
- Add the Map Control to the layout alongside the geolocation control.
- Link the Map Control properties to the document dataset.
- Enable
Draggable Markersto allow repositioning.
Usage
- Open the configured layout.
- Use the Geolocate button to place a marker at your current location.
- Drag the marker to the desired location.
- The geolocation control updates automatically with the new coordinates and address (or Pluscode).
- Zoom in for precise marker placement.
Mobile
On mobile, you need to enable draggable markers by toggling the drag button. Then you can hold a marker to drag it around.
Summary of Key Features
| Feature | Description |
|---|---|
| Geolocate | Fetch current coordinates and address automatically. |
| Geocoding | Input an address to retrieve latitude, longitude, and formatted address. |
| Reverse Geocoding | Convert latitude/longitude to a formatted address. |
| Manual Input | Enter coordinates manually if API access is unavailable. |
| Map Integration | Use draggable markers for precise location selection. |
| Dynamic Updates | Leverage BizzStream Expressions for automatic updates. |