Configure Microsoft Entra applications for external user integration in Aero
Aero lets you synchronize and authenticate users with external services like Microsoft Entra. To set this up, you'll need to configure both Aero and Entra. Start by logging into your Microsoft Entra tenant.
Add and configure an application for user synchronisation
First, you will need to add an application that allows Aero to synchronize users. To do this, follow these steps:
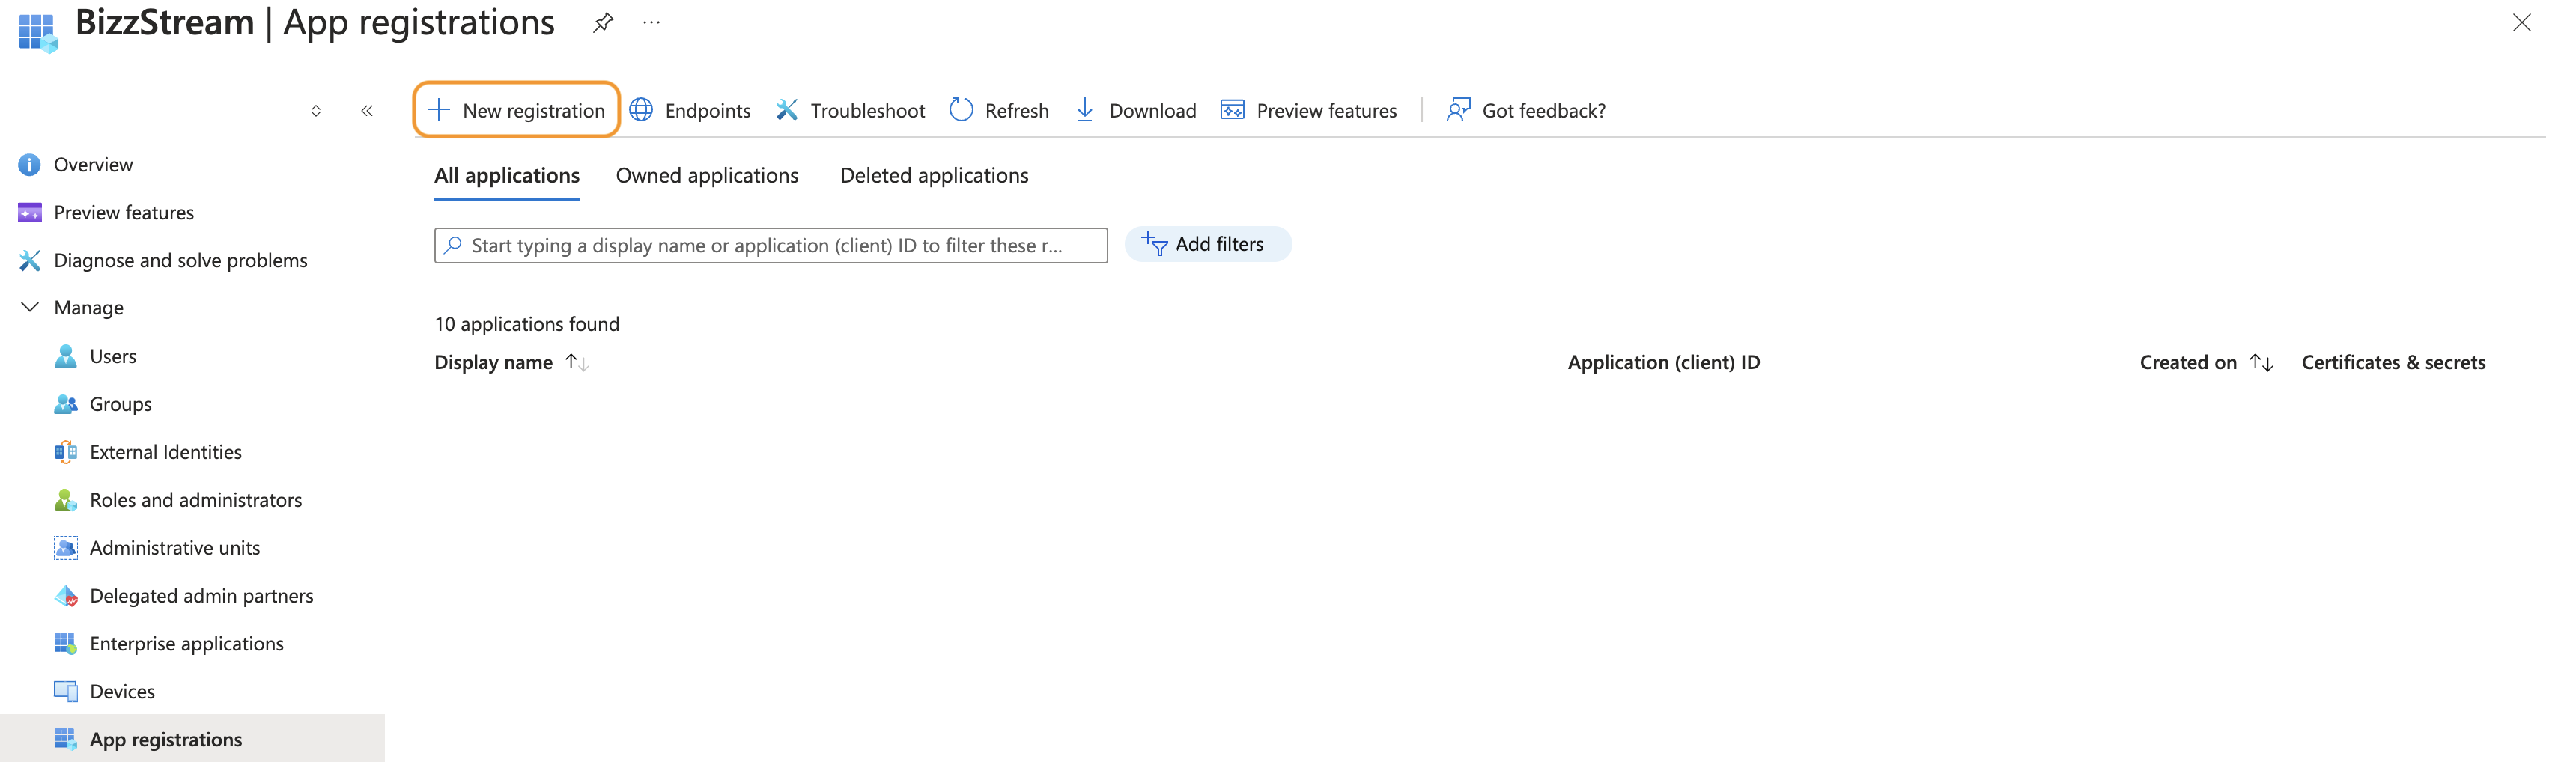
- On the Entra overview page, click App registrations in the side bar.
-
Click New registration.
-
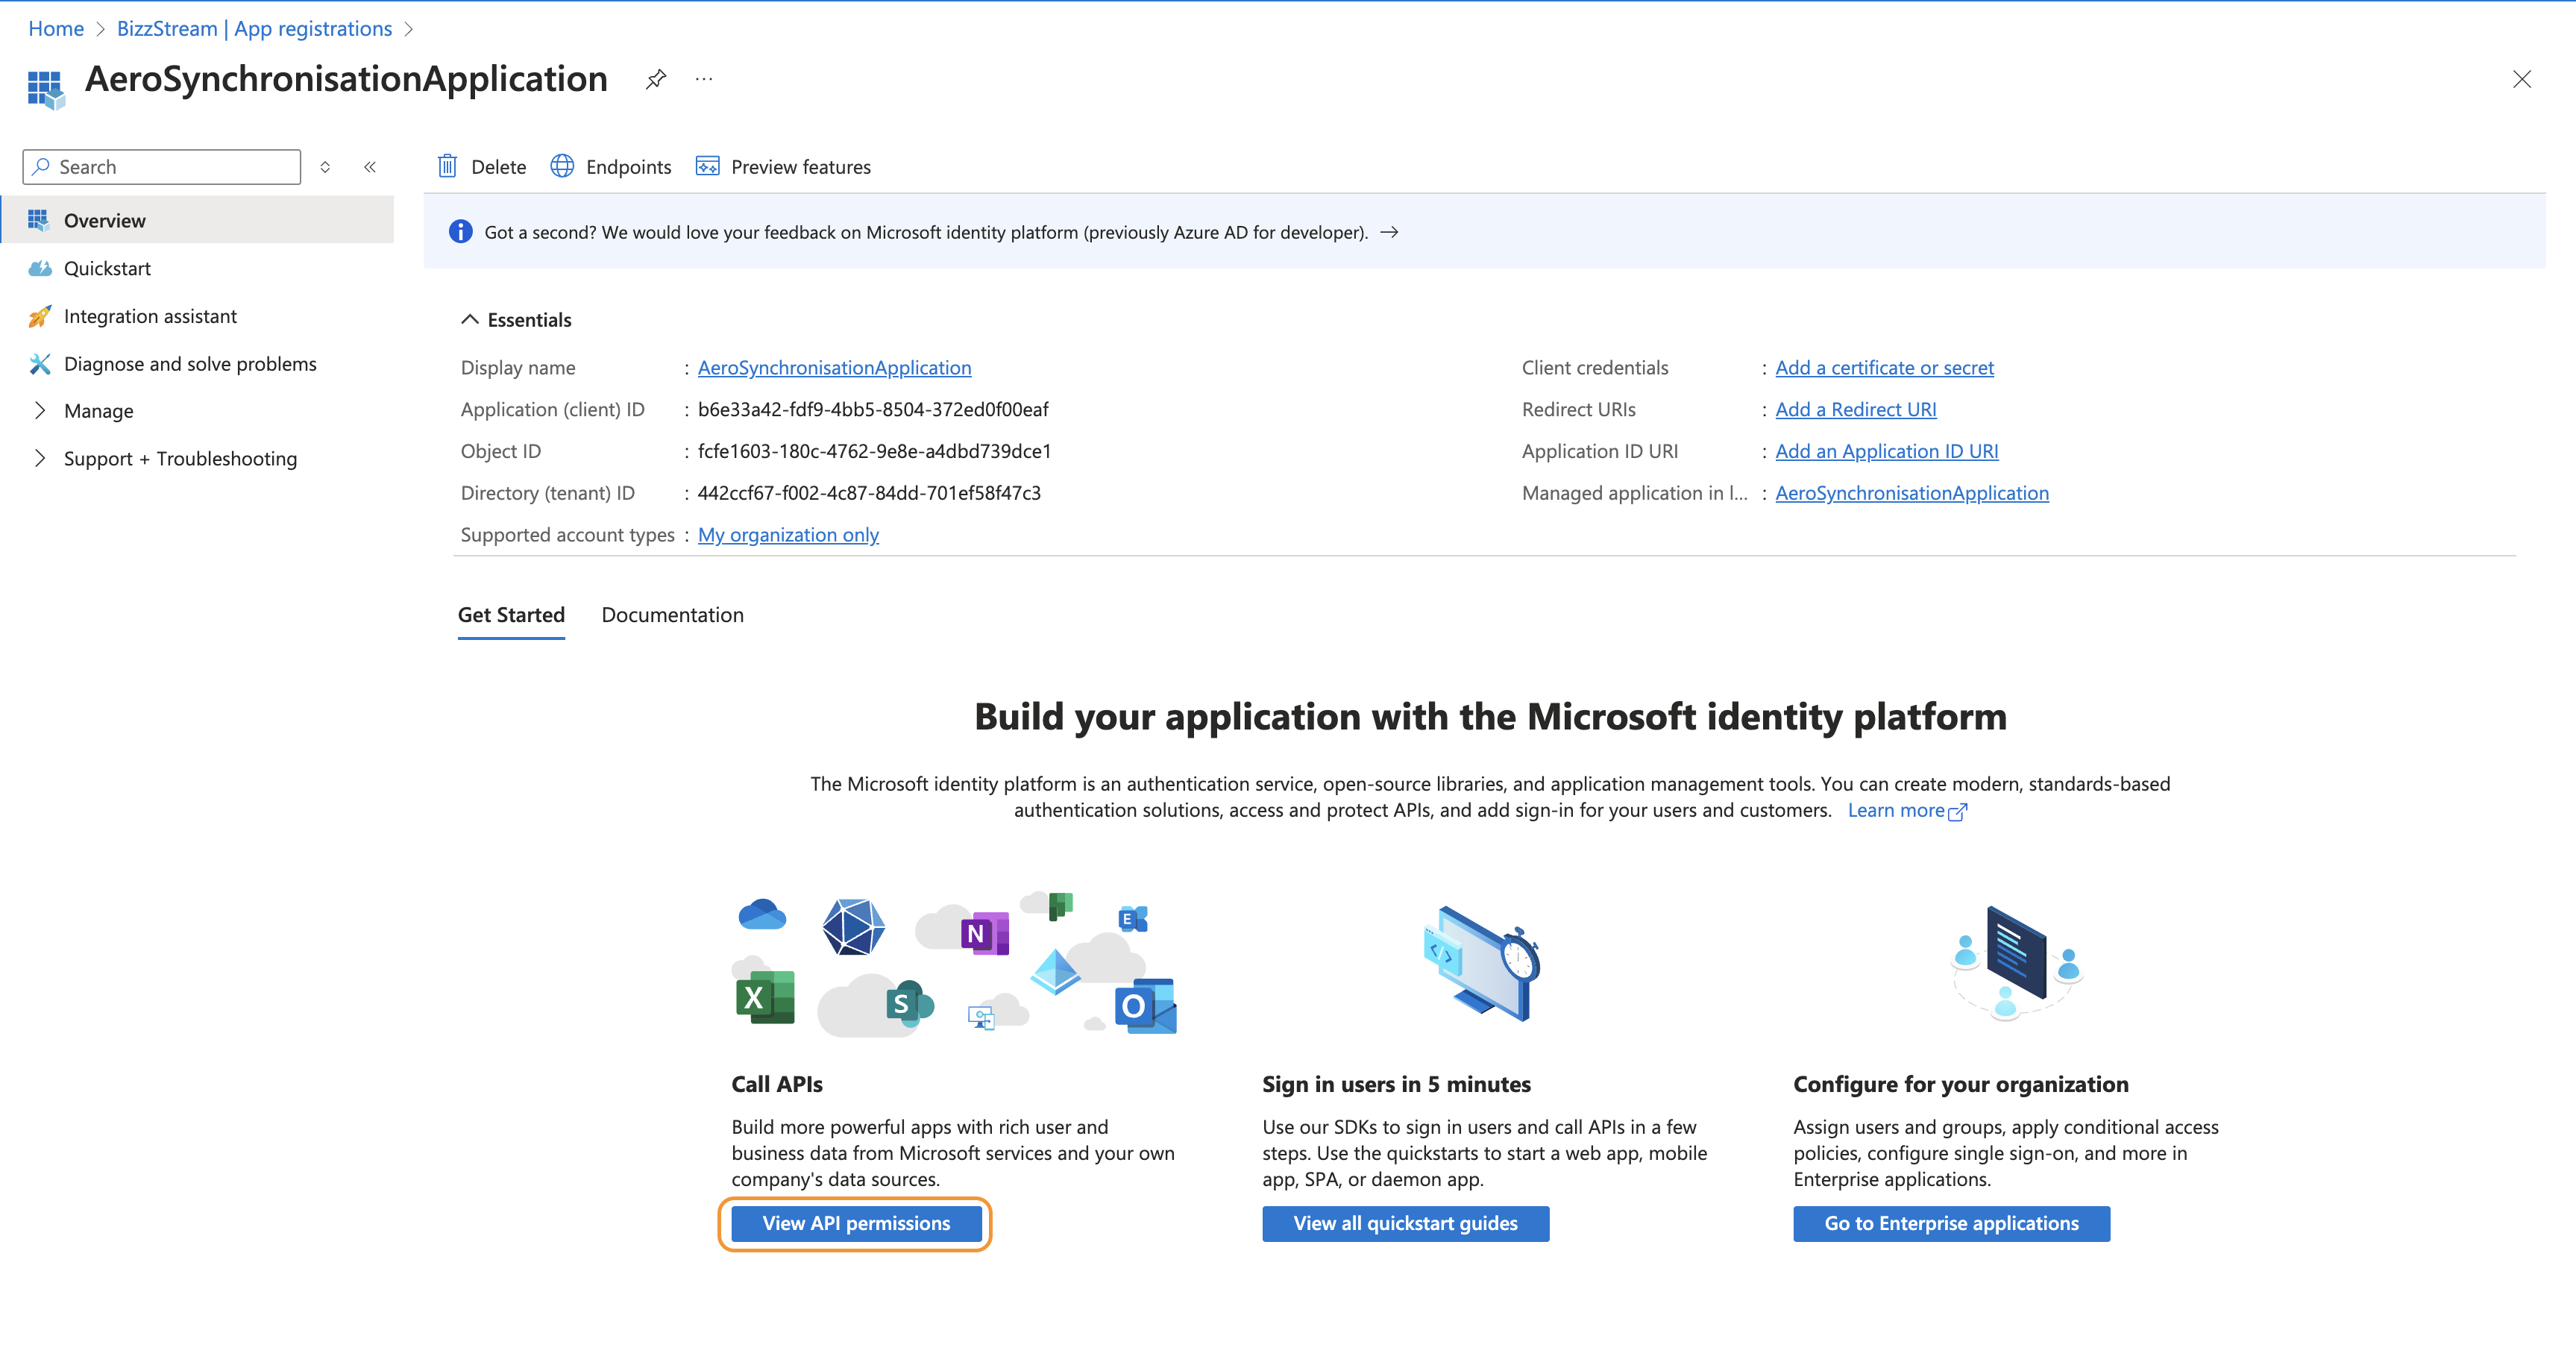
Enter a Name and click Register.

-
Click View API permissions.
-
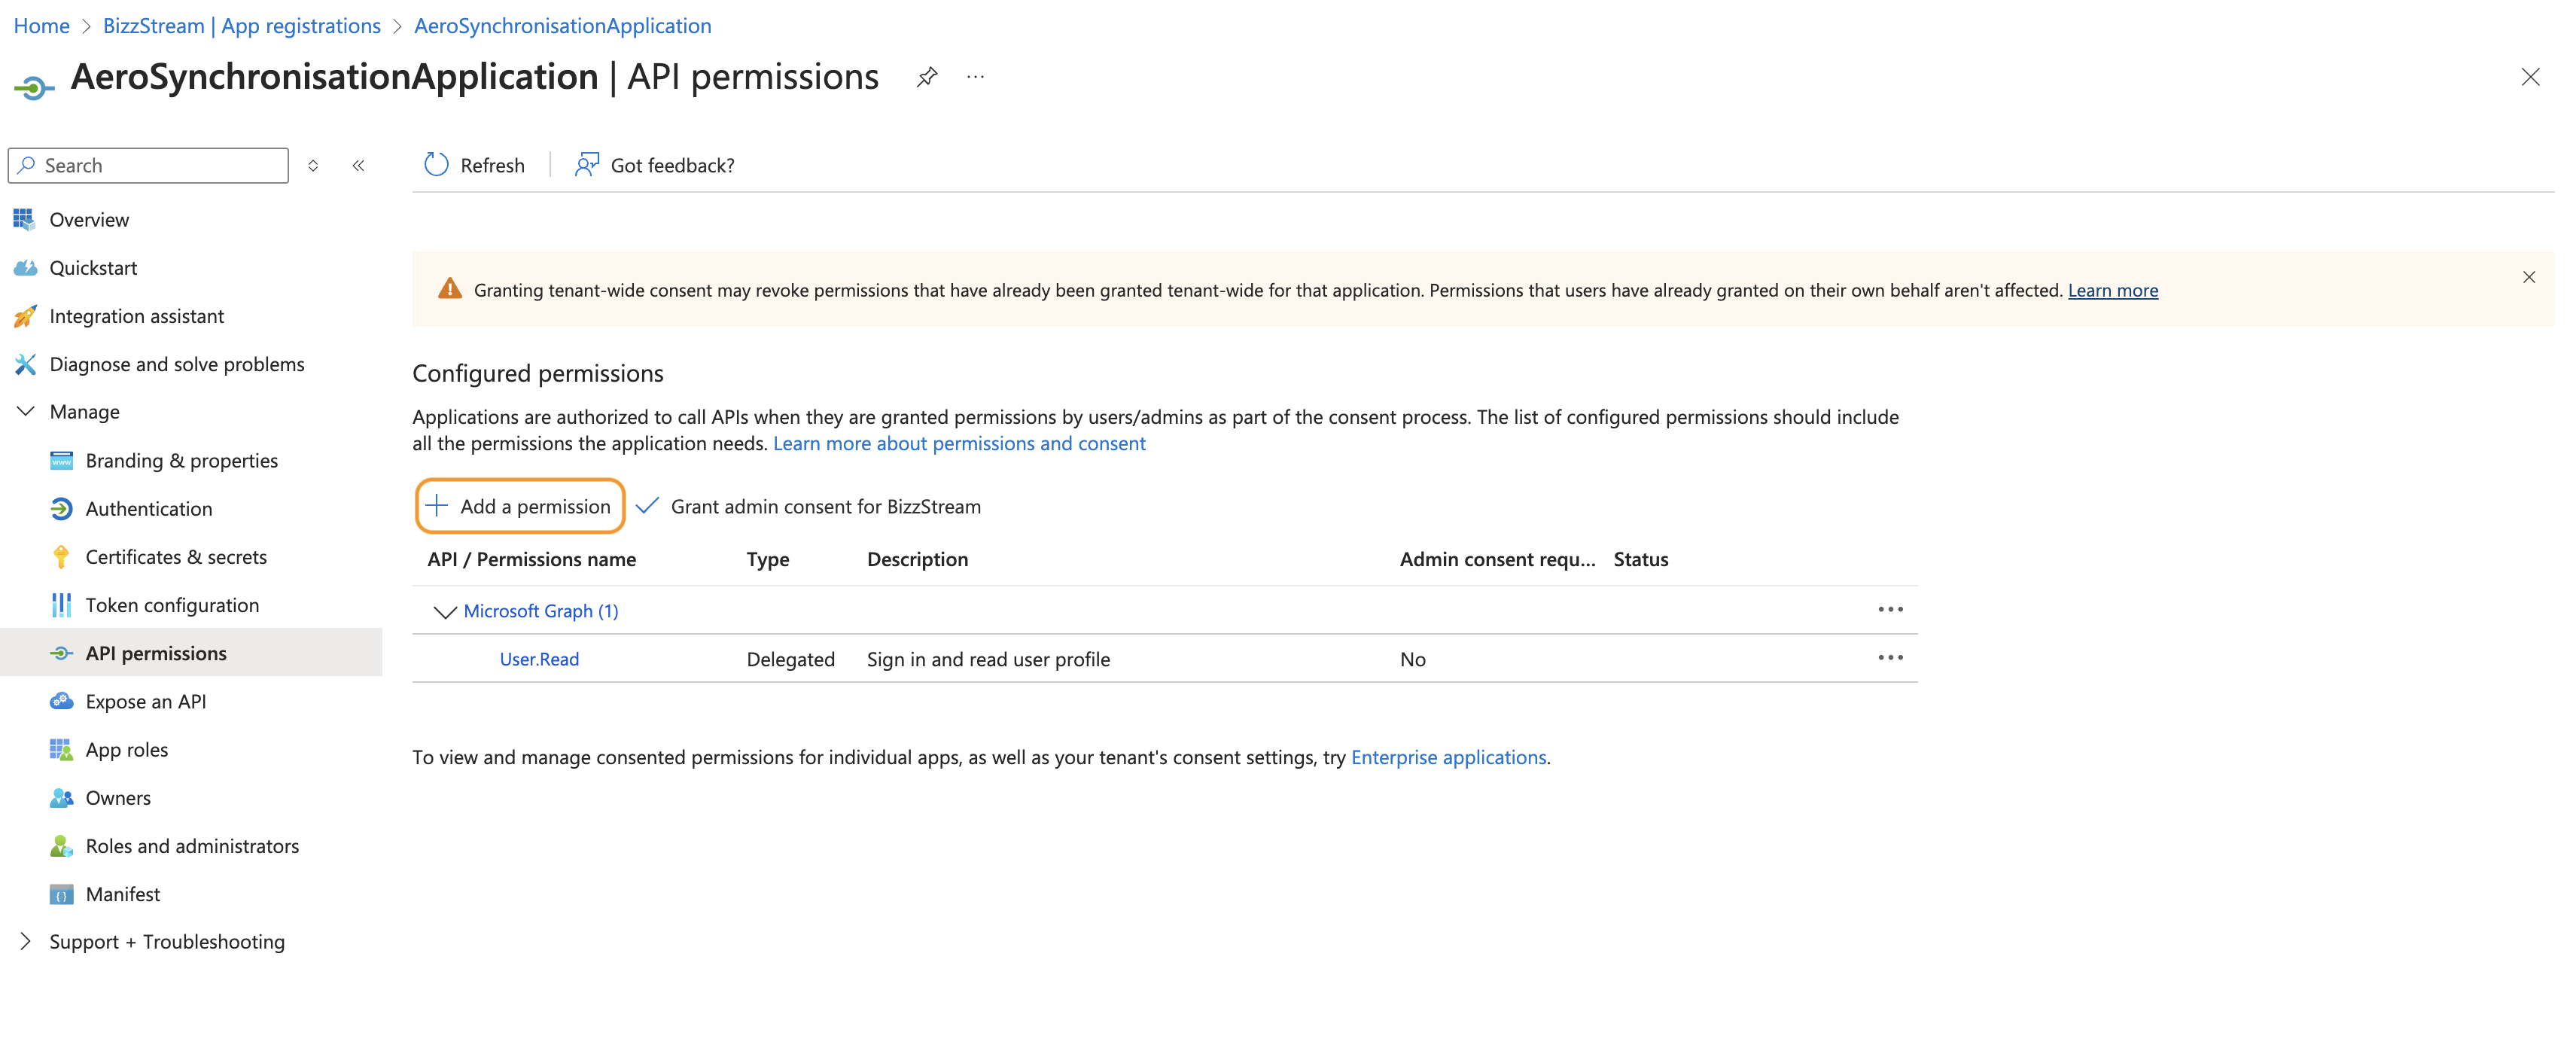
Click Add a permission.
-
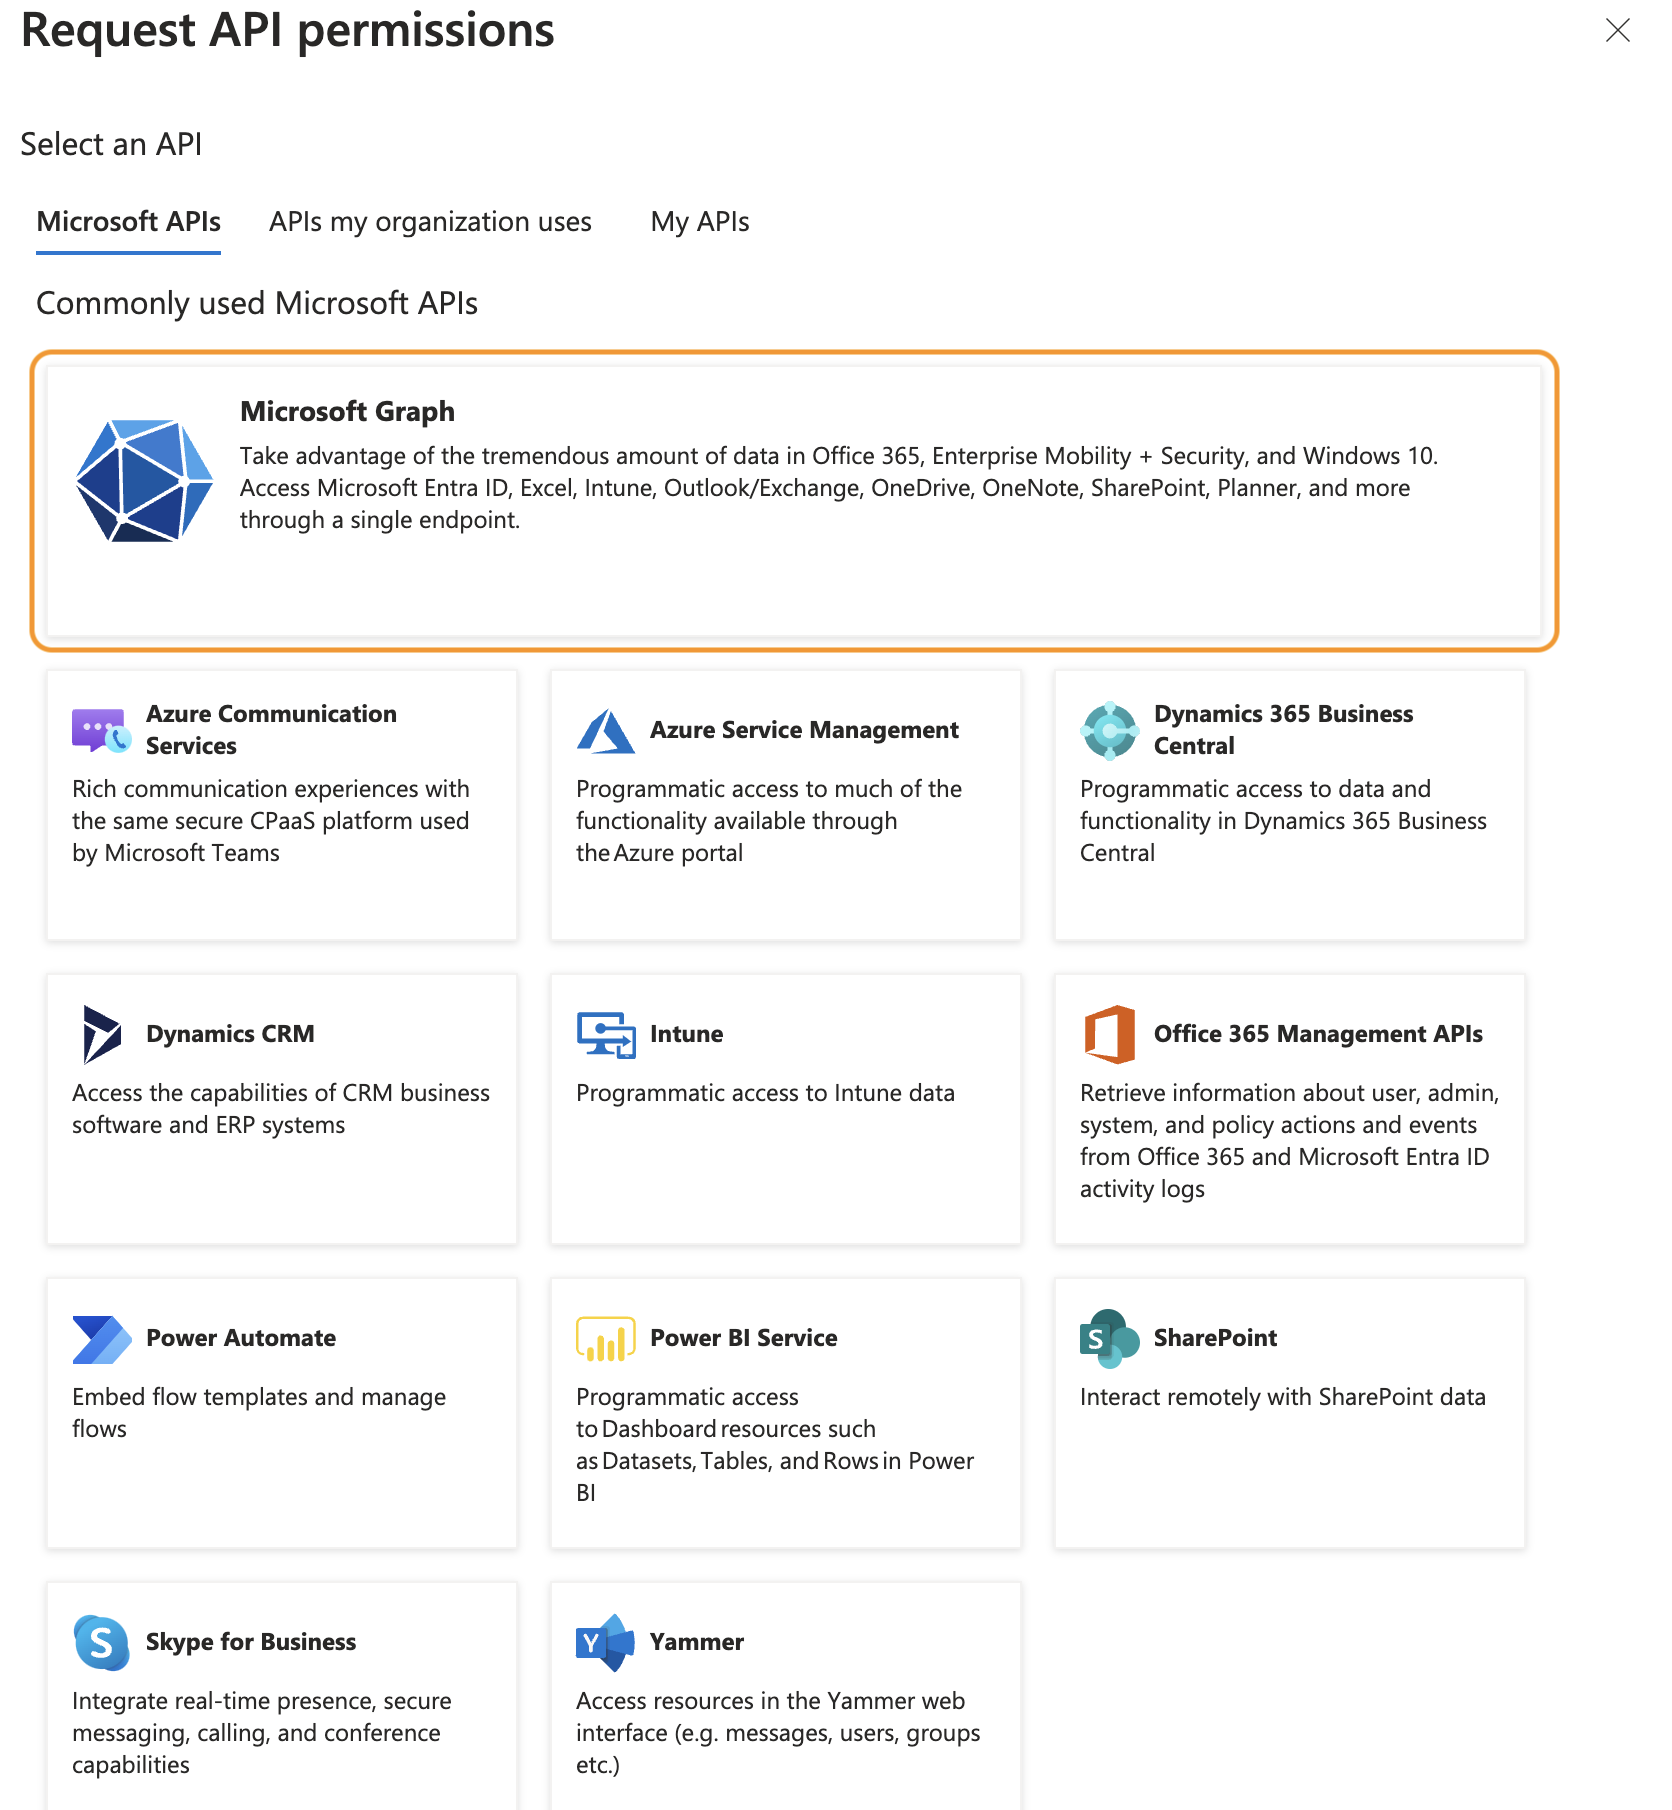
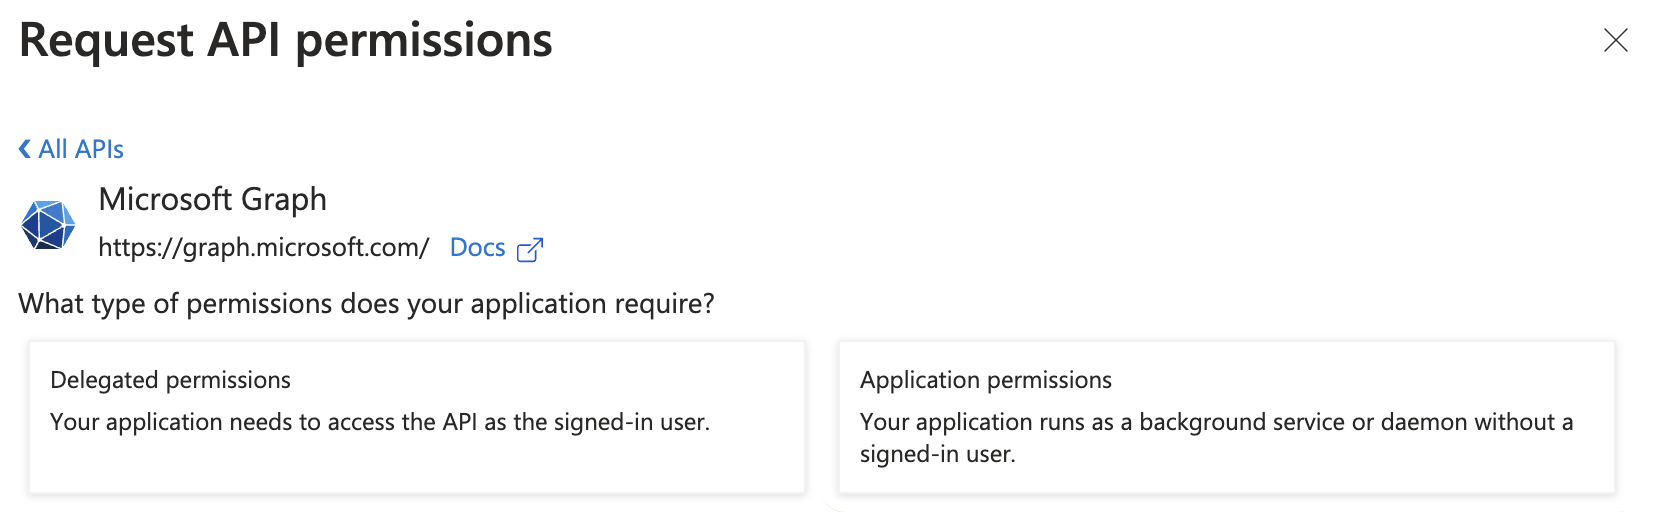
Click Microsoft Graph.
-
Click Application permissions.
-
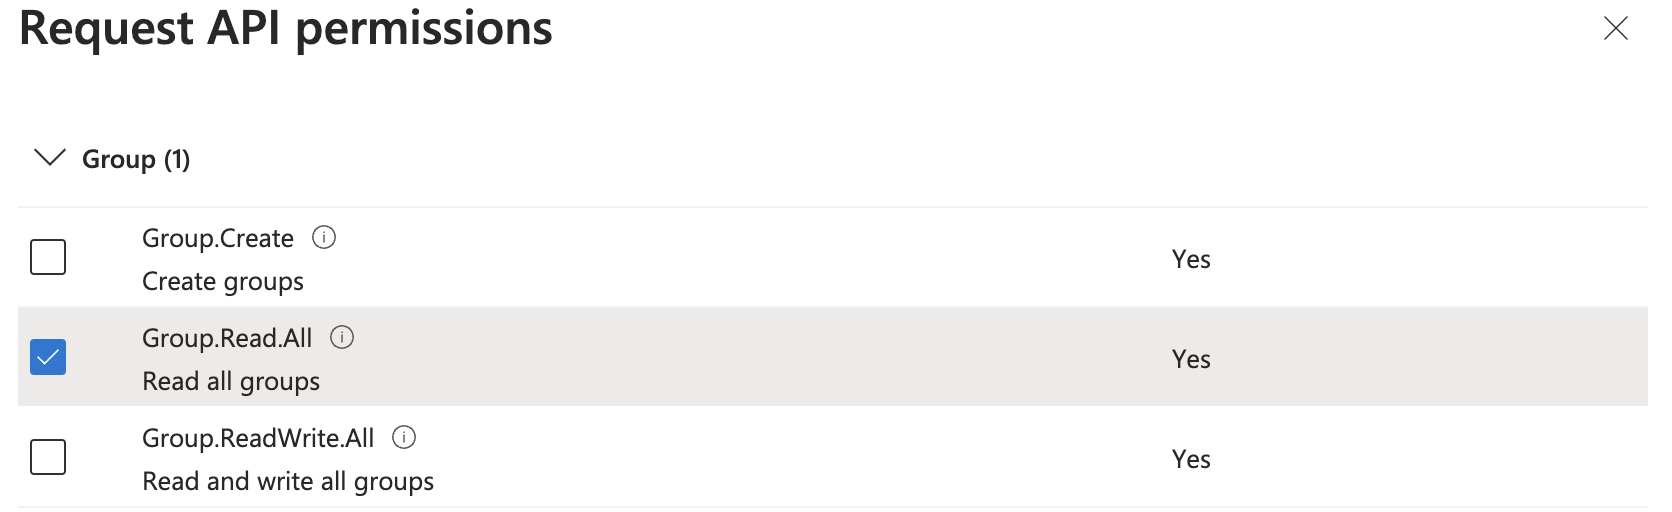
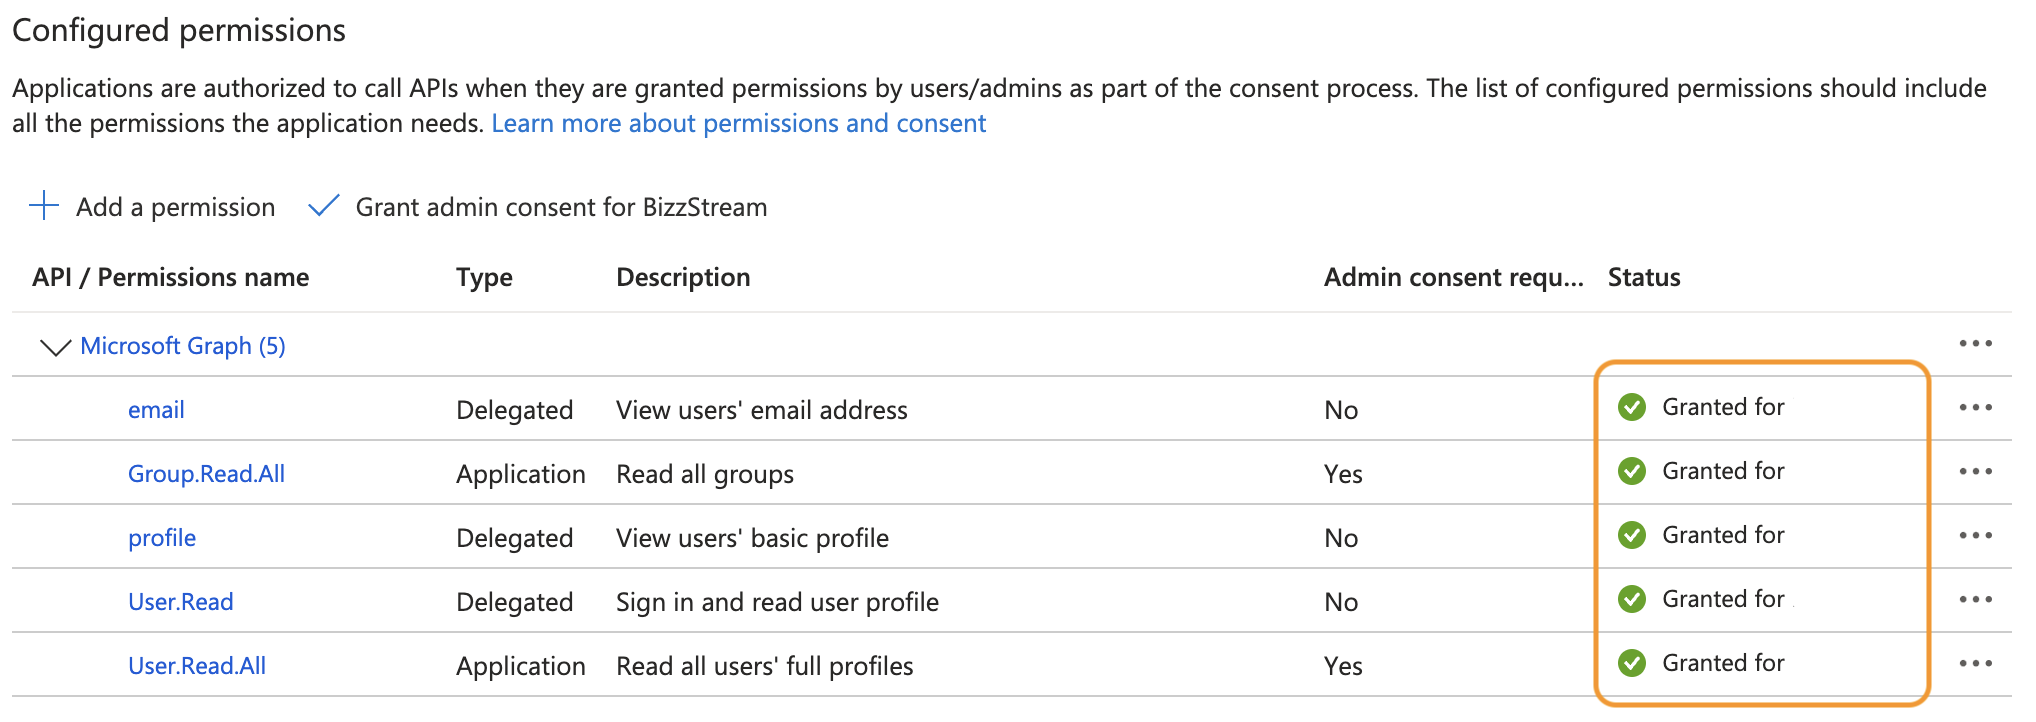
Scroll down to Group and User (or use the search bar), and check the following permissions
- User.Read.All
- Group.Read.All
-
Click Add permissions.

-
In the overview, click Add a permission again.
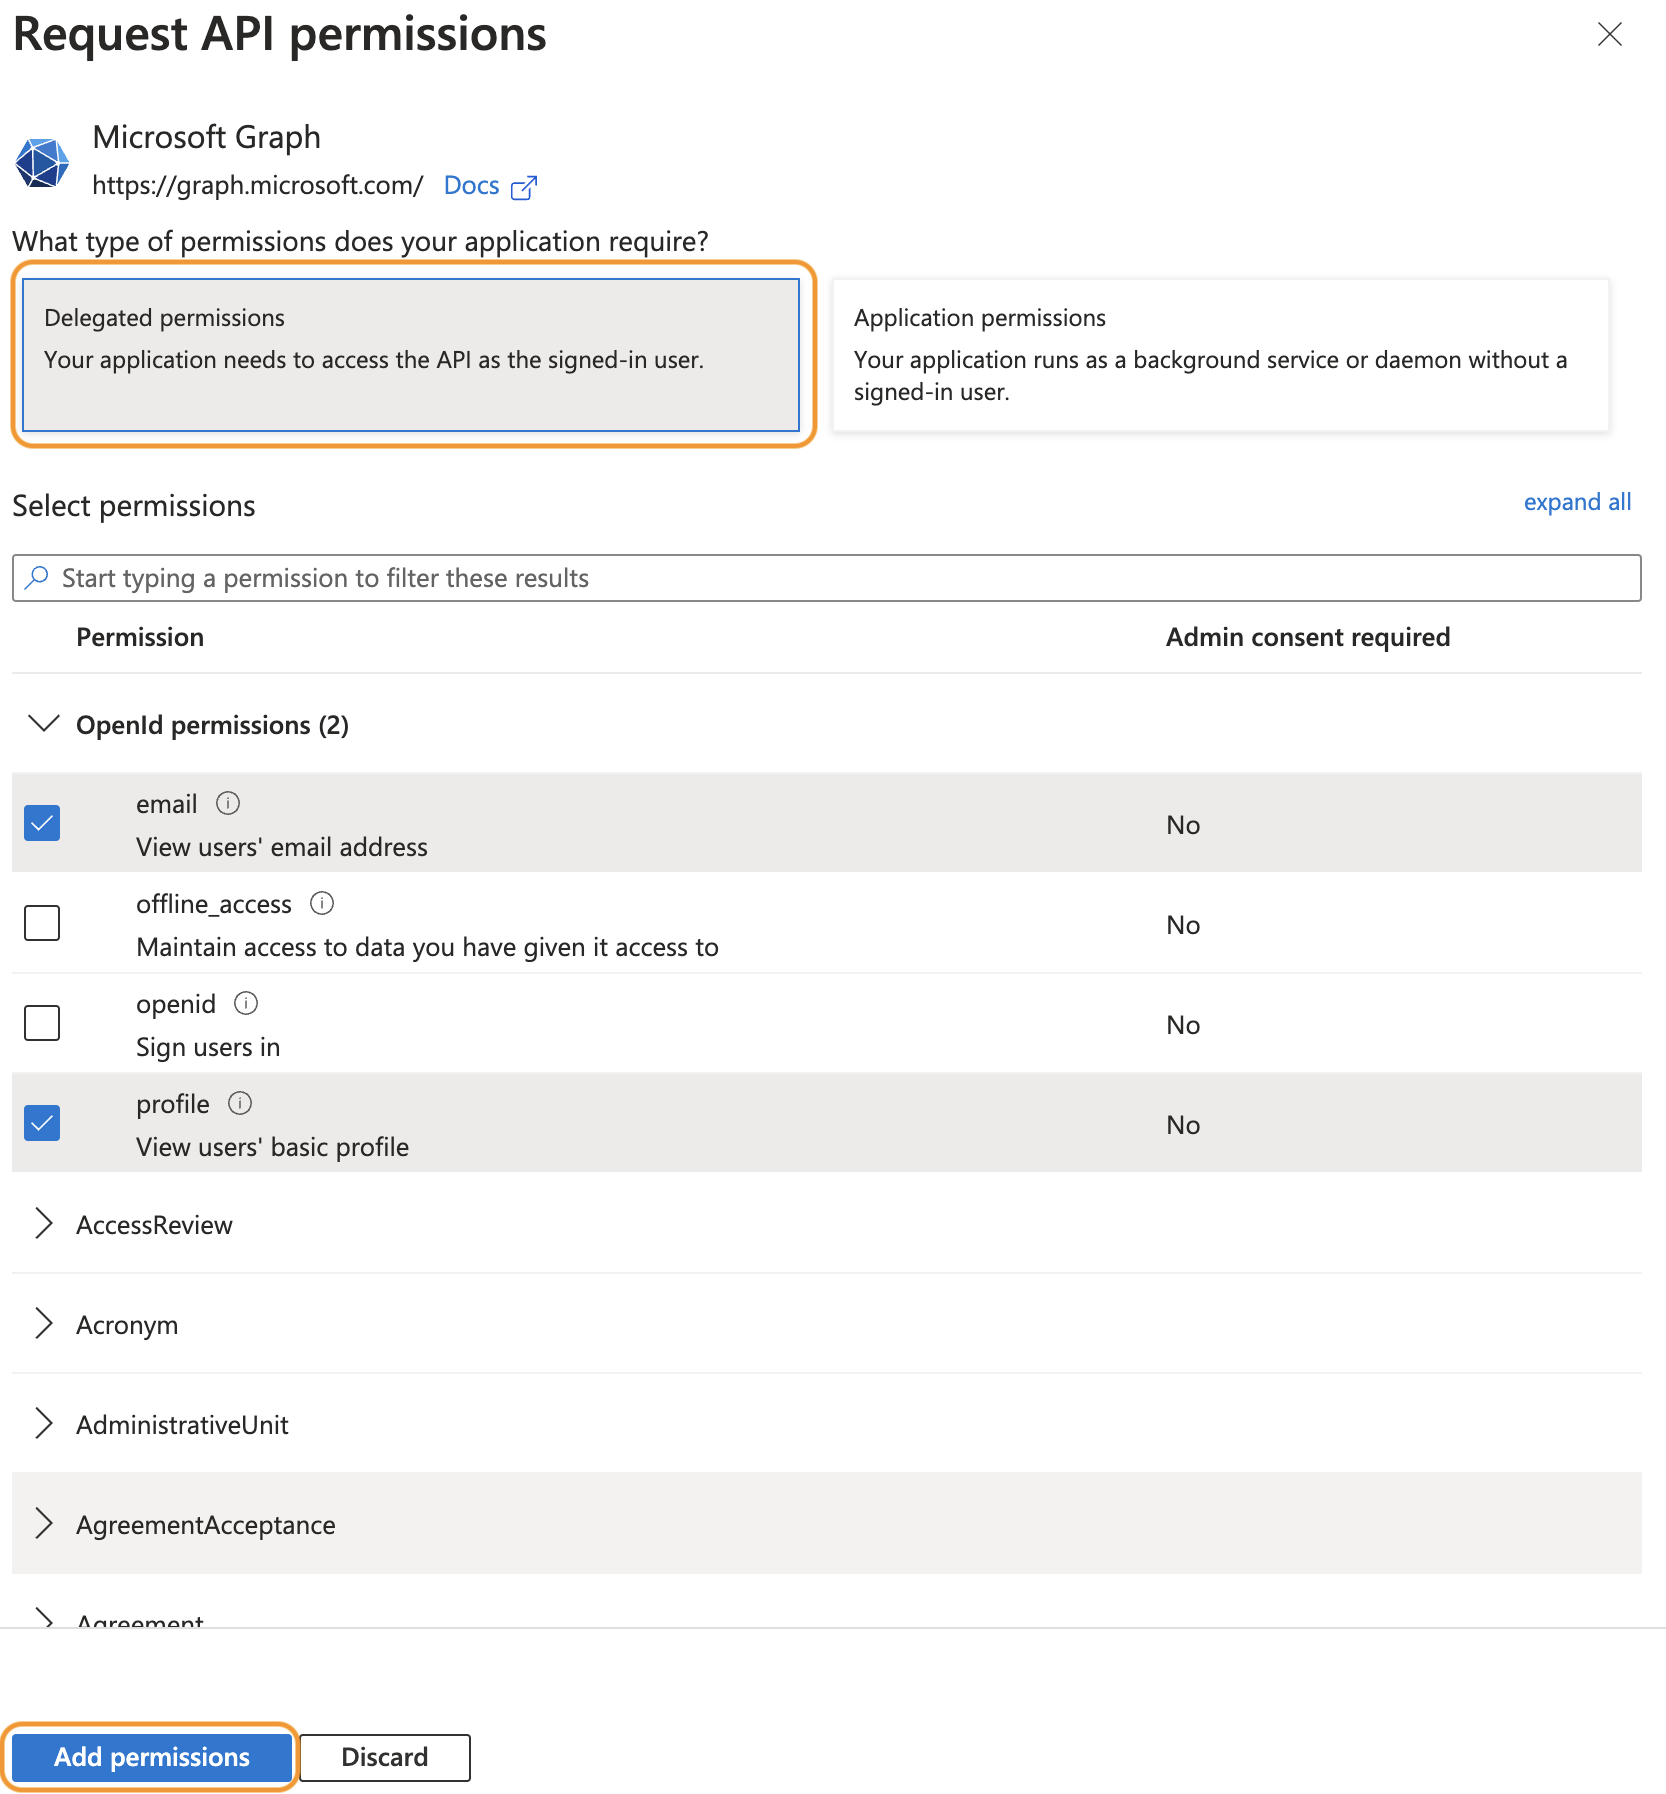
- Click Microsoft Graph, and click Delegated permissions.
- Under OpenID permissions check the following permissions:
- email (View users' email address)
- profile (View users' basic profile)
-
Click Add permissions
-
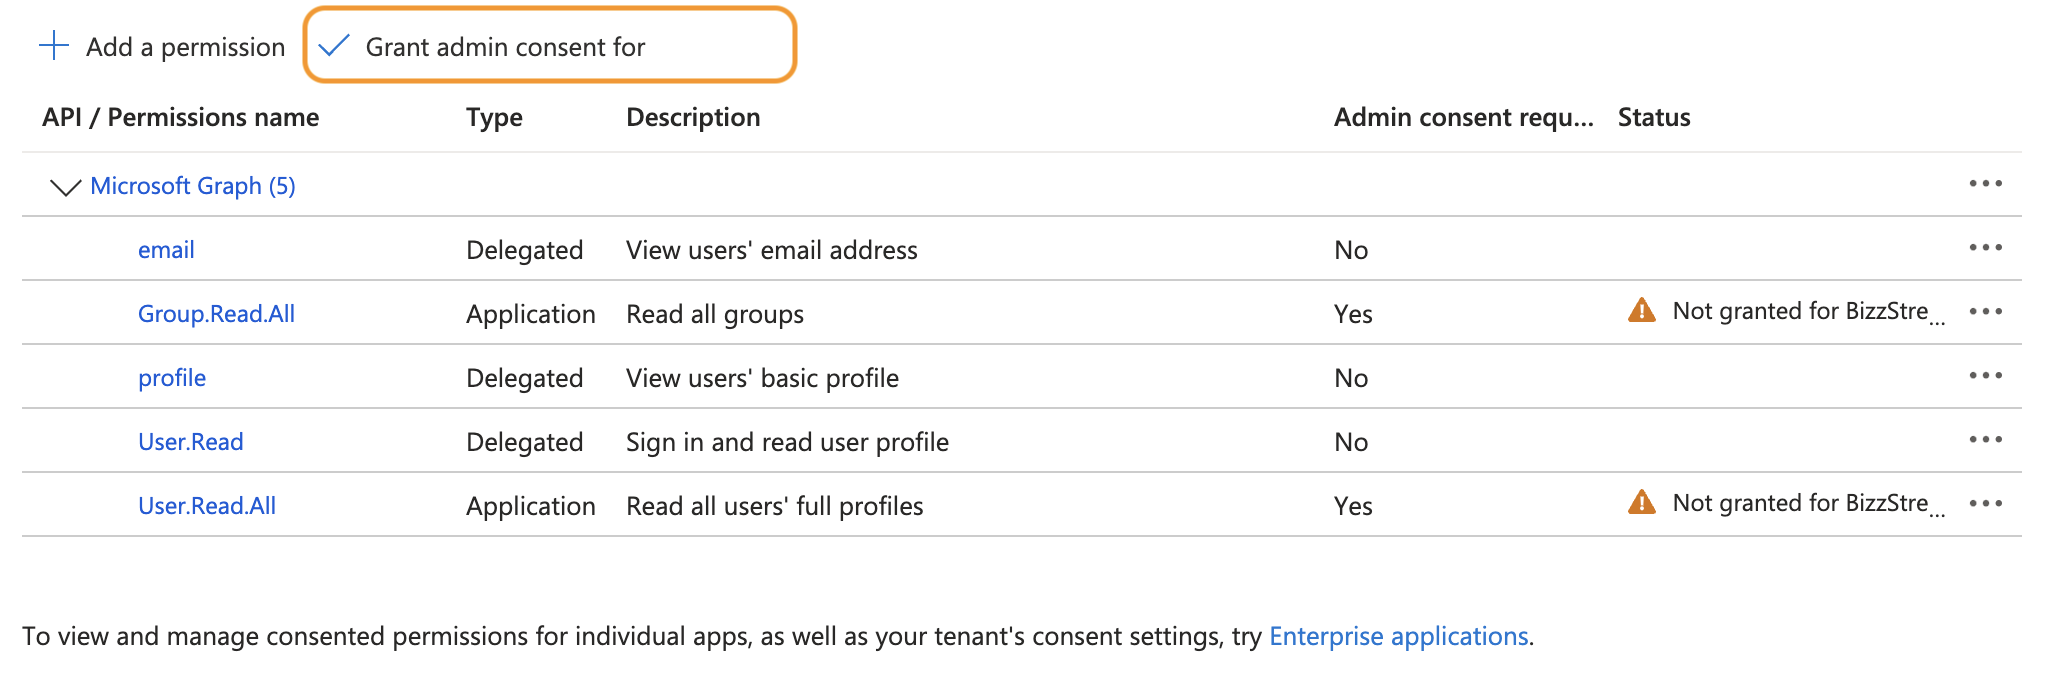
In the overview, click Grant admin consent for 'tenant name'.
-
If you get a popup, click Yes.

-
The status of the permissions is now changed to Granted.
-
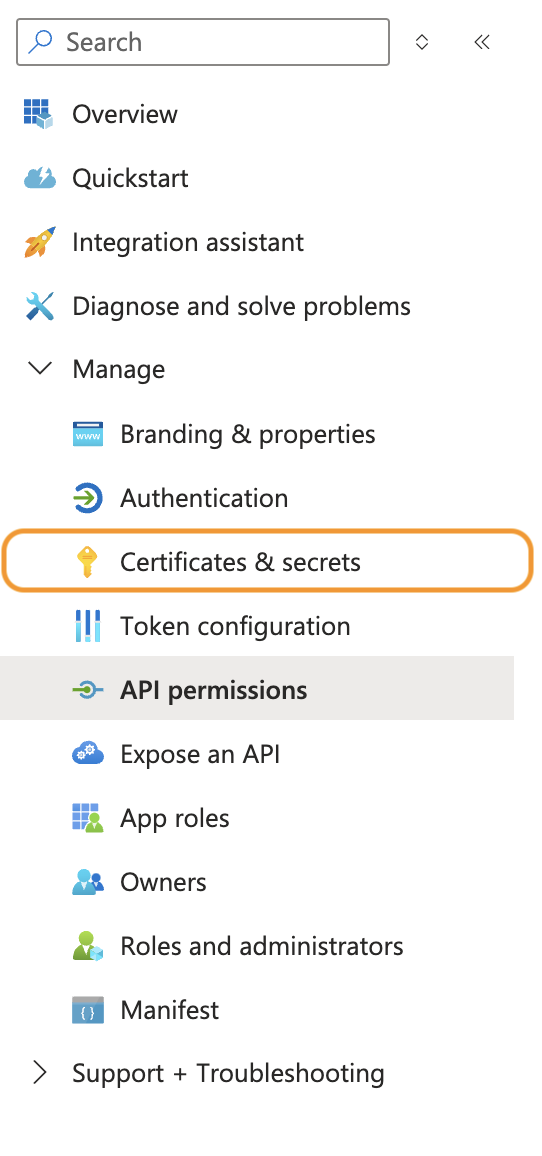
In the sidebar, under Manage, click Certificates & secrets.
-
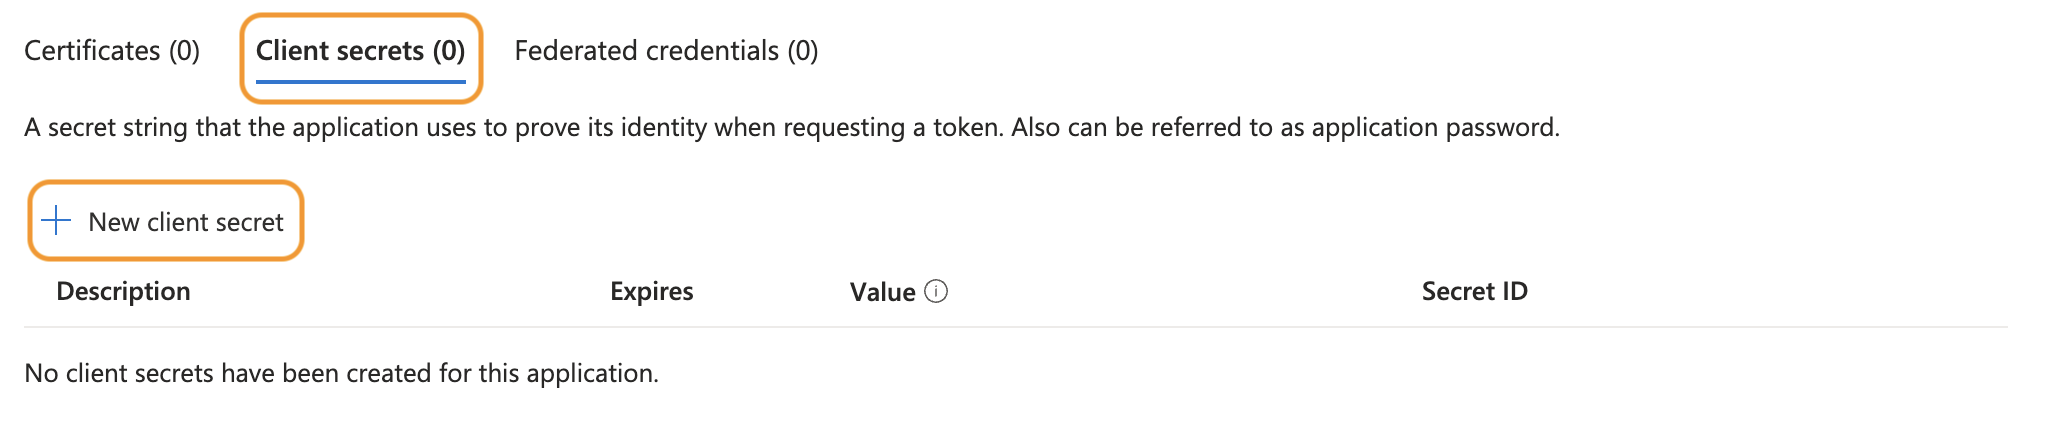
Click the tab Client secrets (#) and click + New client secret.
-
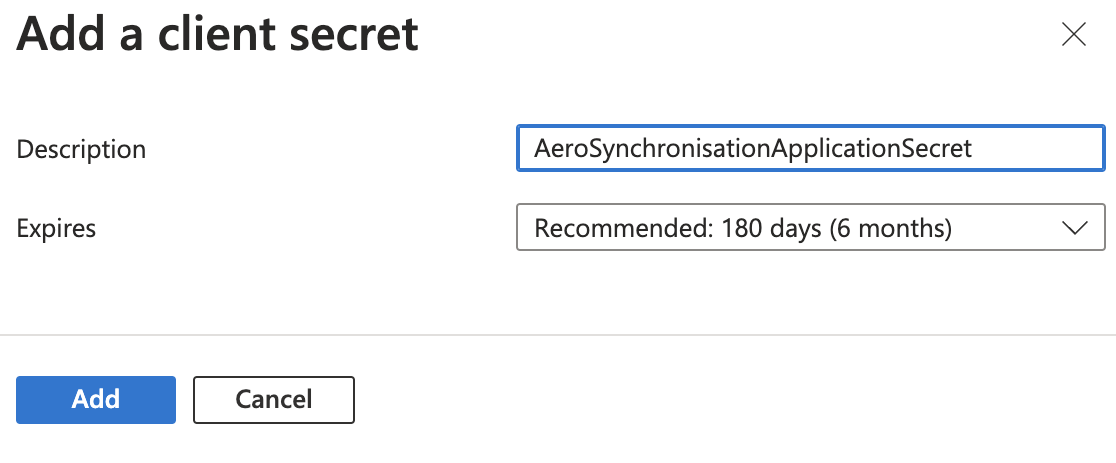
Enter a Description for the secret,and select an expiration under Expires.
-
Click Add.
-
The secret is created. Copy the Value, you will need this in your Aero configuration. Note: the value can only be copied after creating the secret. Once you leave the page, you will no longer be able to copy it.

-
In the sidebar, under Manage, click Authentication.
-
Click Add Redirect URI.
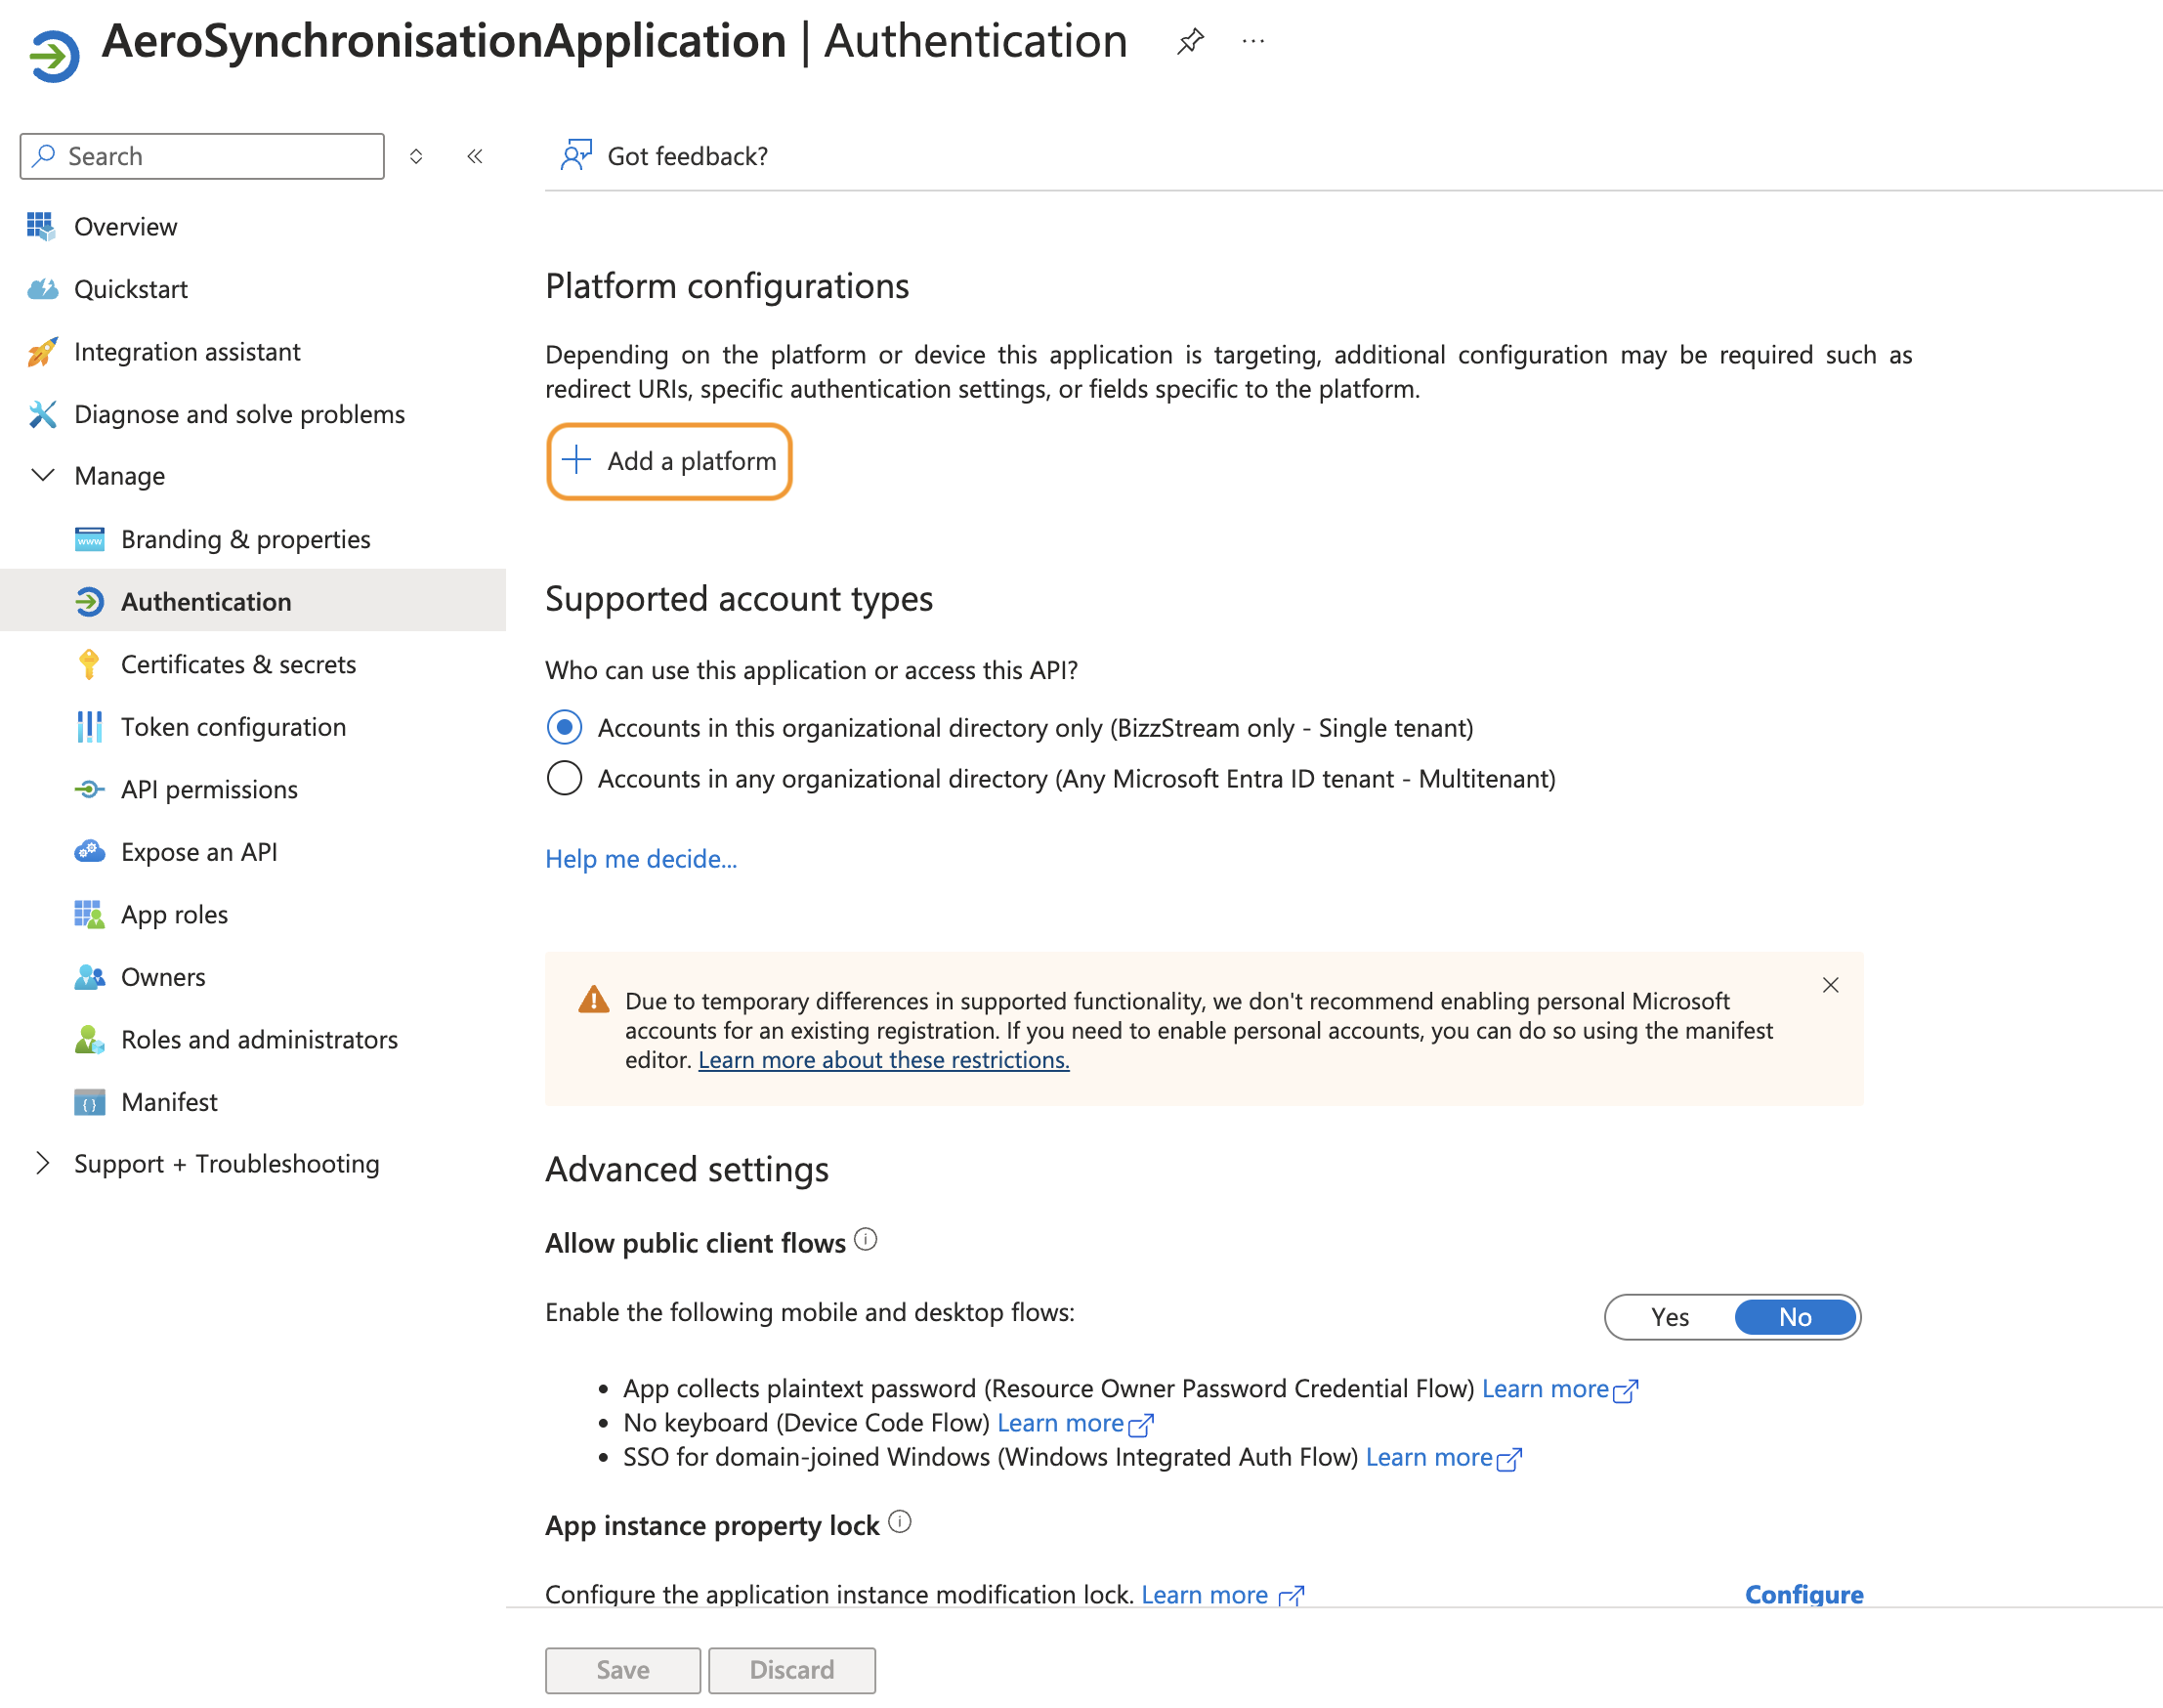
-
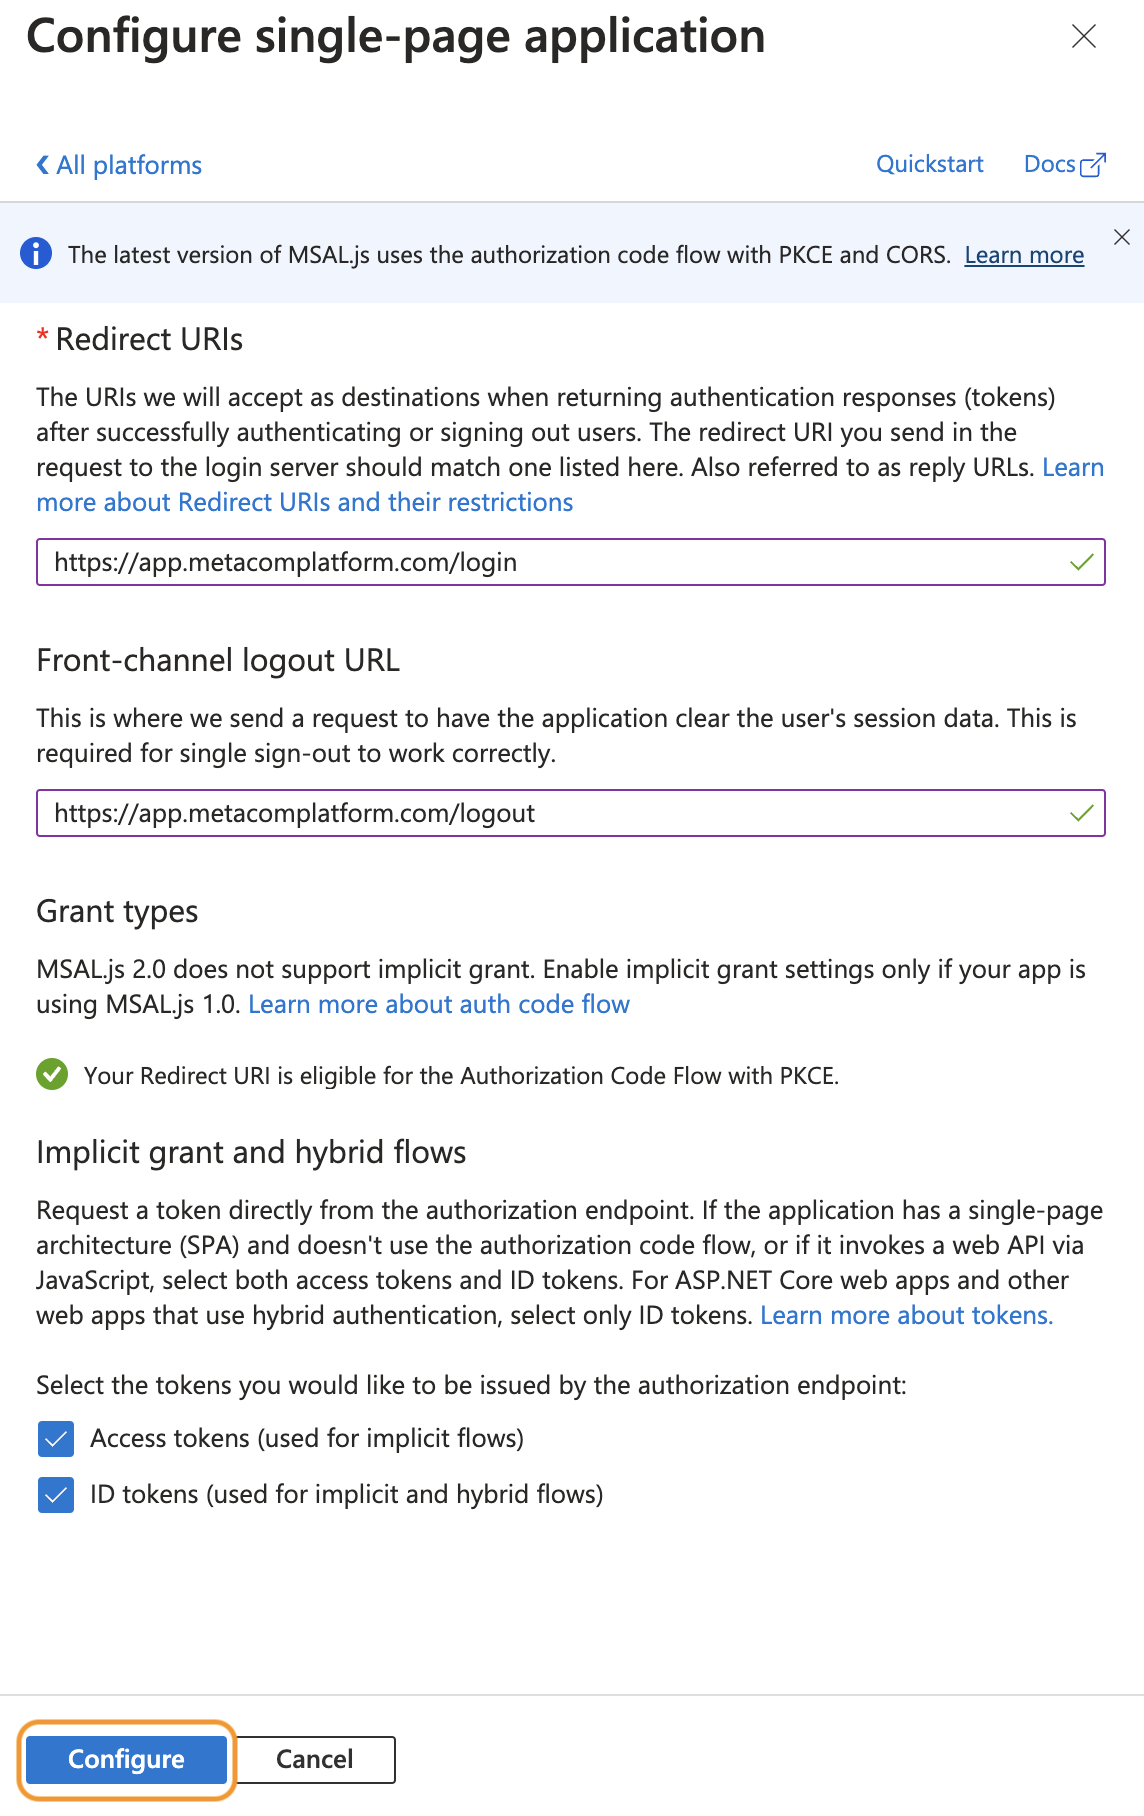
Click Single-page application.
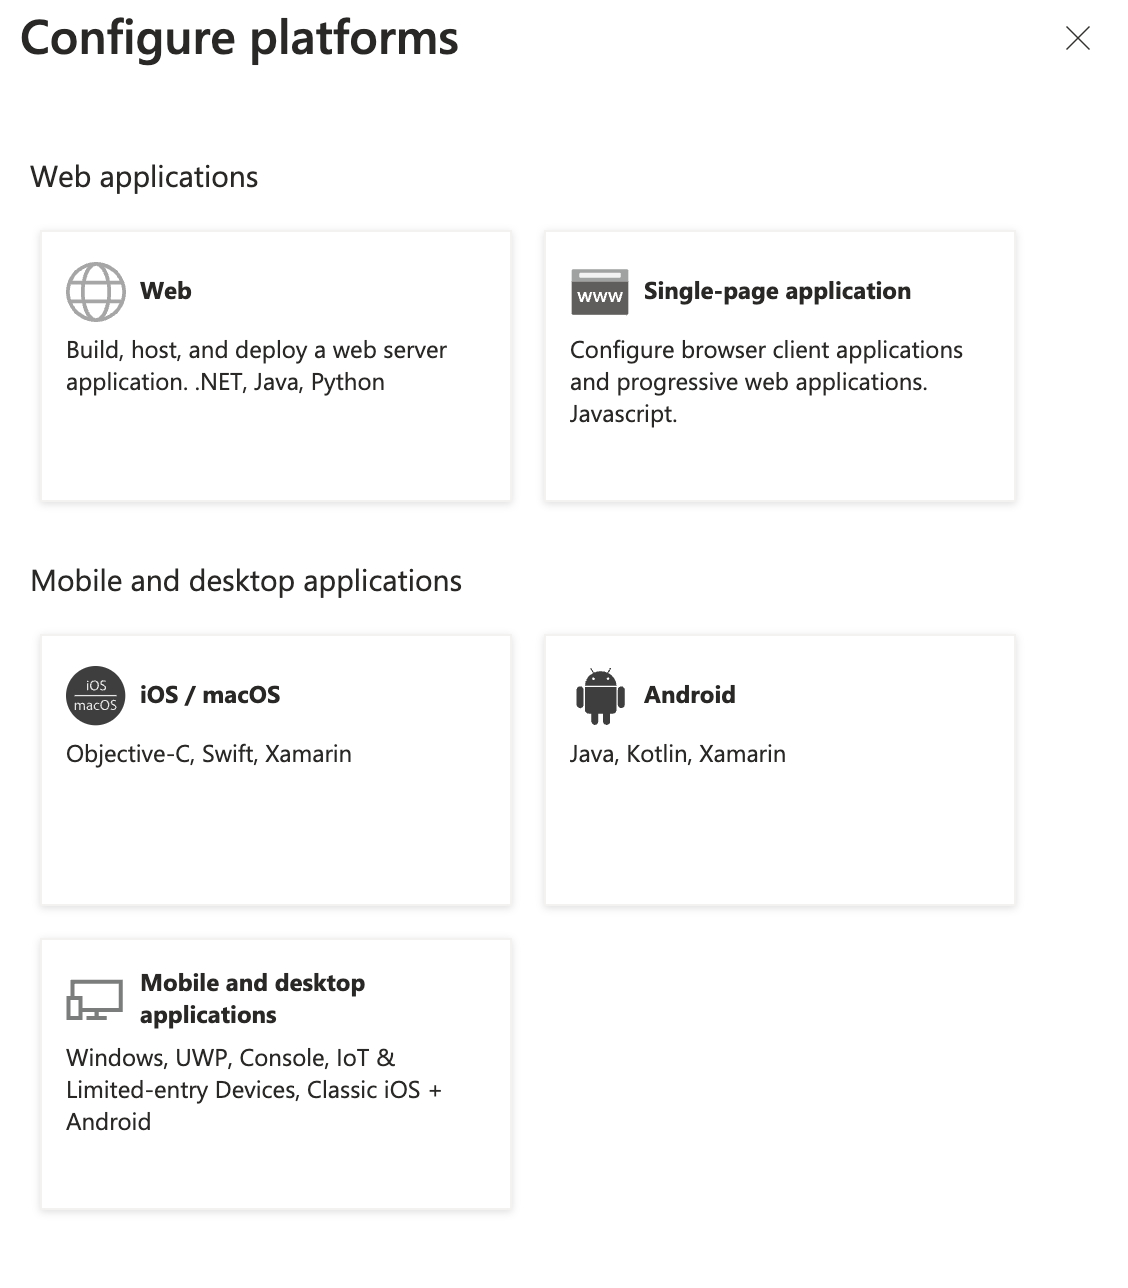
-
Under Redirect URI, enter
https://app.metacomplatform.com/login. - Under Front-channel logout URL, enter
https://app.metacomplatform.com/logout. - Ensure the checkboxes for Access tokens (used for implicit flows) and ID tokens (used for implicit and hybrid flows) are ticked.
-
Click Configure.
-
Click Single-page application again.
-
Under Redirect URI, enter
https://app.metacomplatform.com/and click Configure.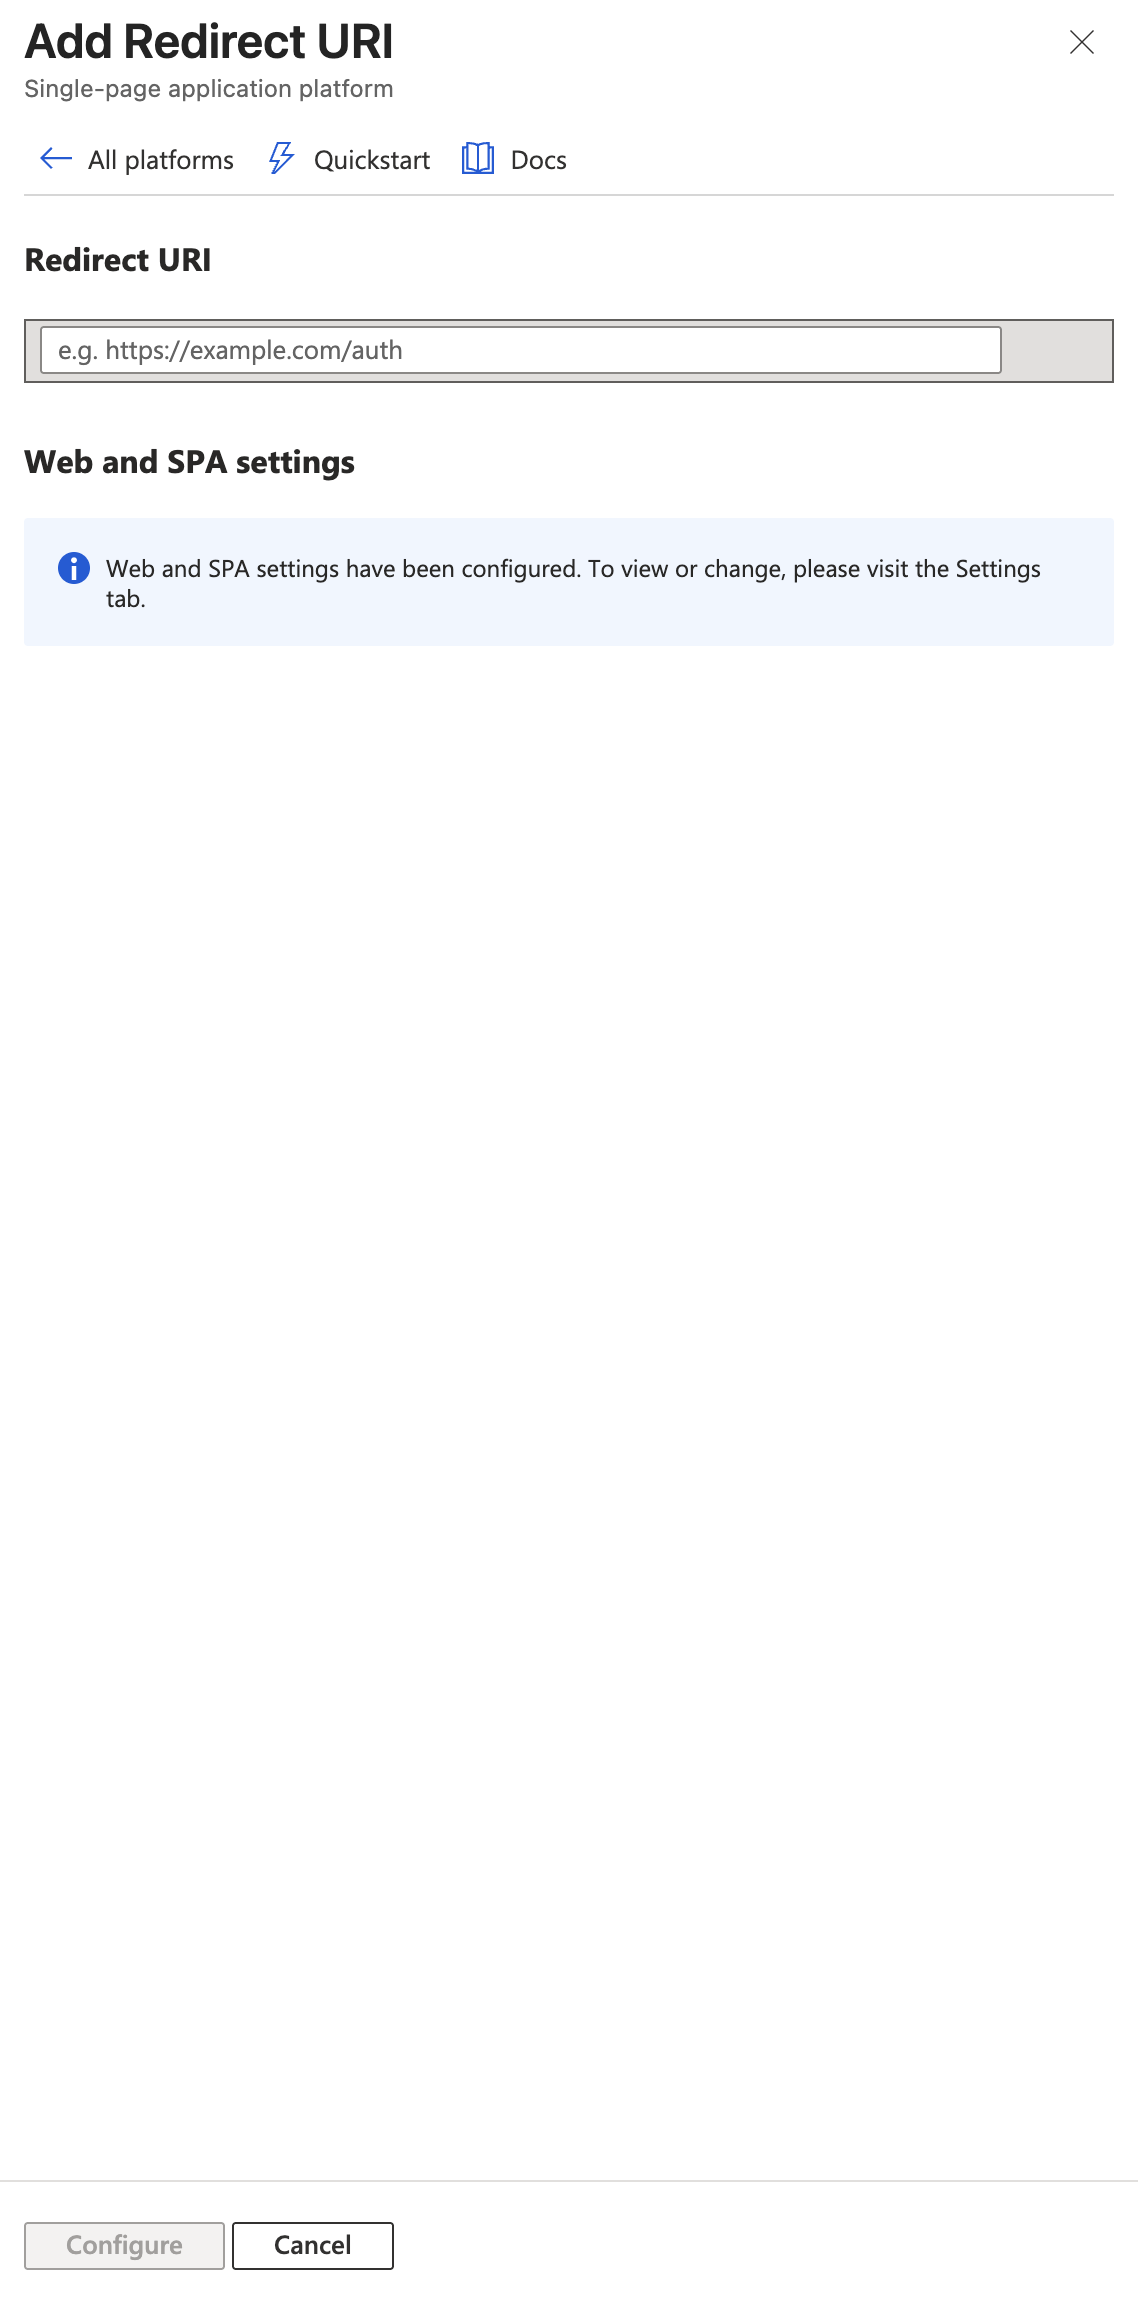
-
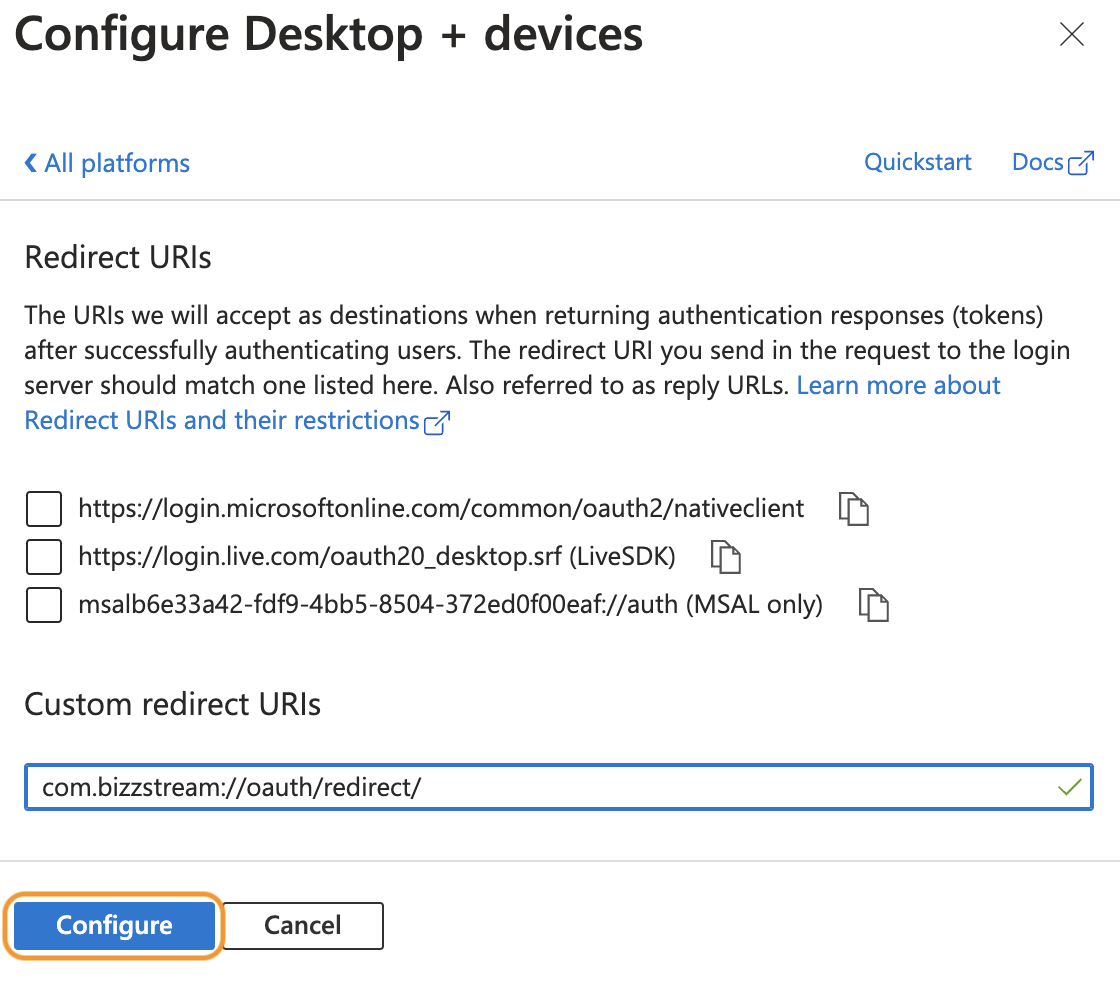
Click Mobile and desktop applications.
- In the URL-field, enter
com.bizzstream://oauth/redirect/. -
Click Configure.
-
Close the right-hand sidebar by clicking the cross-icon.
- In the left-hand sidebar, click Manifest.
- In the api-object, ensure requestedAccessTokenVersion has value 2.
![Set requestedAccessTokenVersion]](../common-assets/external-user-integration/setRequestedAccessTokenVersionInManifest.png.png)
You have now configured an app registration you can use to integrate with BizzStream Aero.
Create a Directory Service in Aero
Now that you have finished the configuration of applications in Entra, you can create a Directory Service in Aero, and connect it to your Entra applications.